- Arts, Crafts & Sewing
- Model & Hobby Building
- Watercraft Kits
Enjoy fast, free delivery, exclusive deals, and award-winning movies & TV shows with Prime Try Prime and start saving today with fast, free delivery

Amazon Prime includes:
Fast, FREE Delivery is available to Prime members. To join, select "Try Amazon Prime and start saving today with Fast, FREE Delivery" below the Add to Cart button.
- Cardmembers earn 5% Back at Amazon.com with a Prime Credit Card.
- Unlimited Free Two-Day Delivery
- Streaming of thousands of movies and TV shows with limited ads on Prime Video.
- A Kindle book to borrow for free each month - with no due dates
- Listen to over 2 million songs and hundreds of playlists
- Unlimited photo storage with anywhere access
Important: Your credit card will NOT be charged when you start your free trial or if you cancel during the trial period. If you're happy with Amazon Prime, do nothing. At the end of the free trial, your membership will automatically upgrade to a monthly membership.
Return this item for free
We offer easy, convenient returns with at least one free return option: no shipping charges. All returns must comply with our returns policy.
- Go to your orders and start the return
- Select your preferred free shipping option
- Drop off and leave!

Image Unavailable

- To view this video download Flash Player
Model Expo Sail Cloth, 18 X 36 (457 X 915MM) MS0567 Medium Weight Cotton from for Model Ship Building
Purchase options and add-ons
- Sail Cloth, 18 X 36 (457 X 915MM) MS0567 Medium Weight Cotton
- This medium weight cotton sail cloth is the perfect addition your model ship, enhancing its authenticity.
- Model Expo has been serving hobby enthusiasts with precision Models since 1976, and is a hobby tools manufacturer, distributor, and reseller.
- Free replacement parts policy and 30 day return privilege for any reason.
Frequently bought together

Featured items you may like

PRODUCT CERTIFICATION (1)
The Forest Stewardship Council certified products support responsible forestry, helping keep forests healthy for future generations.

Product information
| Product Dimensions | 4 x 4 x 1 inches |
|---|---|
| Item Weight | 1.97 ounces |
| ASIN | B07B678S2K |
| Manufacturer recommended age | 15 years and up |
| Customer Reviews | 4.5 out of 5 stars |
| Is Discontinued By Manufacturer | No |
| Manufacturer | Model Expo |
Warranty & Support
Product Description
| Customer Reviews | ||||||
|---|---|---|---|---|---|---|
| Price | $39.99$39.99 | $21.99$21.99 | — | $299.99$299.99 | $34.99$34.99 | — |
| Some of Our Products | The most popular Plank Bender | Professional Grade Nail Nailer | Laser Cut in our Factory | One of our most built Model Kits | Save Time Rigging | Require no rounding or sanding. |
Looking for specific info?
Customer reviews.
- 5 star 4 star 3 star 2 star 1 star 5 star 71% 16% 8% 0% 4% 71%
- 5 star 4 star 3 star 2 star 1 star 4 star 71% 16% 8% 0% 4% 16%
- 5 star 4 star 3 star 2 star 1 star 3 star 71% 16% 8% 0% 4% 8%
- 5 star 4 star 3 star 2 star 1 star 2 star 71% 16% 8% 0% 4% 0%
- 5 star 4 star 3 star 2 star 1 star 1 star 71% 16% 8% 0% 4% 4%
Customer Reviews, including Product Star Ratings help customers to learn more about the product and decide whether it is the right product for them.
To calculate the overall star rating and percentage breakdown by star, we don’t use a simple average. Instead, our system considers things like how recent a review is and if the reviewer bought the item on Amazon. It also analyzed reviews to verify trustworthiness.
- Sort reviews by Top reviews Most recent Top reviews
Top reviews from the United States
There was a problem filtering reviews right now. please try again later..

- Amazon Newsletter
- About Amazon
- Accessibility
- Sustainability
- Press Center
- Investor Relations
- Amazon Devices
- Amazon Science
- Sell on Amazon
- Sell apps on Amazon
- Supply to Amazon
- Protect & Build Your Brand
- Become an Affiliate
- Become a Delivery Driver
- Start a Package Delivery Business
- Advertise Your Products
- Self-Publish with Us
- Become an Amazon Hub Partner
- › See More Ways to Make Money
- Amazon Visa
- Amazon Store Card
- Amazon Secured Card
- Amazon Business Card
- Shop with Points
- Credit Card Marketplace
- Reload Your Balance
- Amazon Currency Converter
- Your Account
- Your Orders
- Shipping Rates & Policies
- Amazon Prime
- Returns & Replacements
- Manage Your Content and Devices
- Recalls and Product Safety Alerts
- Registry & Gift List
- Conditions of Use
- Privacy Notice
- Consumer Health Data Privacy Disclosure
- Your Ads Privacy Choices
- Vanquish 65
- Mini Maniac
- RG65 Appendages
- Maniac MK II
- IOM Appendages
- Marblehead Class
- Marblehead Appendages
- RT65 Ragnarok
- RT65R Armageddon
- RC65 Adrenaline
- ST65 Sowelu
- Mini40 / F48 Class
- Nightmare X
- Nightmare MK VIII
- MultiOne Class
- FireDragon 1000
- DIY Sail Winch
- Rig Building

- Masting, rigging and sails

- Remember me Not recommended on shared computers
Forgot your password?
Your best sail cloth and technique
By steven sturgis March 11, 2015 in Masting, rigging and sails
- Reply to this topic
- Start new topic
Recommended Posts
Steven sturgis.
Hi every one. I have been looking for the best sail cloth for my Flying Fish build. I would like to get a lot of suggestions that I can look at. Please include where the cloth can be bought. Do you change the color with dyes? do you age the cloth some how? How do you add detail to the sails? All sail makers are welcome to post their designs I know a lot of you don't put on sail because it covers the rigging so anyone that does would be a great asset to the topic. Looking forward to seeing your tricks and designs.
sail techniques http://modelshipworl...-and-technique/
Link to comment
Share on other sites.

Click on the Nautical Research Guild Home Page straight up to the top of the page, then, click on Ship Modeling Resources, then, click on Ship Modeling Database of Articles, Then click Rigging and Sails, then click the pdf "Making and forming sails for your model."
I could have pasted the direct link, but thought it better for you to see everything that was available here on MSW.
You can go to a Joanne's or any yard goods store and buy Egyptian cotton, almost silk like. Coffee and/or tea make good stains, very controllable.
I'm certain there will be other suggestions to follow....
- tasmanian and LFrankCPA

Thank you twintrow. I did look at that but some one needs to go back and up date the links. About 80% don't work any more. I was going for full rigged full sails. Can you do that in paper? 1/8 scale
Im sure this is old hat to the expert modelers but passing on that knowledge is needed by the next generation of builders
- JerseyCity Frankie

I make sails for models in scale 1:75 with seams of the cloths sewing marked with single thread ( courtesy of Admiral ). For models in scale 1:100 I use computer printing of cloths lines and reef bands on thermal transferring paper for ironing on to sails fabric . Sails leech, head and foot ropes are fixed in its place with use of textile adhesive .
Material for sails I prefer is old bed linen many, many times washed .
Work step by step
1.Make paper stencil for each sail and check it’s dimensions on your model.
2.With soft pencil transfer all lines in to fabric – add stripe 5-7 mm around
sail edges.
3.Make all necessary lines on fabric using sewing machine and thin thread with light brown or beige color.
For sails with thermal transferring of line any sewing is not necessary.
Cut of sail shape.
4. Fold the edges stripe to reverse side of sail and apply textile adhesive
5. Put sail on flat surface protected against glue adhesion ( wax paper )
and fix it with pins and nails for forming clews.
Using textile adhesive attach thread around sail and form clews and cringles as necessary.
After adhesive excess removal from sail surface and final ironing your sail is ready.
Foto 1-10 Sail making Step by Step
Foto 11 HMS Speedy - printed sails
Foto 12 HMS Warrior - printed sails
Foto 13 Patern for printing sails for S/S Savannah

- Canute , thibaultron , IgorSky and 9 others

I wouldn't use paper. If you don't want to use cloth, use silkspan from a hobby shop that deals with the RC guys/gals. It comes in various weights and you'd probably need to acquire small amounts of several sizes to find which one works best for you.
- Canute and Elia
Mark "The shipwright is slow, but the wood is patient." - me Current Build: Past Builds: La Belle Poule 1765 - French Frigate from ANCRE plans - ON HOLD Tri ton Cross-Section
NRG Hallf Hull Planking Kit HMS Sphinx 1775 - Vanguard Models - 1:64
Non-Ship Model: On hold, maybe forever:
CH-53 Sikorsky - 1:48 - Revell - Completed Licorne - 1755 from Hahn Plans (Scratch) Version 2.0 (Abandoned)
Good stuff.
I have seen some members using silkspan and modelspan. Any thought on this material. I'm not familiar with thermal transferring paper. can you elaborate. How do you use textile adhesive with out making a mess? Is it diluted in any way?
The adhesive is not diluted , unwanted stains of adhesive on sails can be easily removed by scraping .

Thanks for outlining the step by step process you use. In my opinion, the thermal transfer is brilliant. I have been hesitating to start my sails for quite a while because I don't want to sew the seam lines (I think they would look too bulky) and I don't trust myself to be able to draw them evenly using pencil. You have certainly given me something to think about! I imagine transfer will be more durable than pencil - another plus for the technique.
Current build -- MS Bluenose
Future build - MS Flying Fish
"A ship is safe in harbor, but that's not what ships are for." - William G. T. Shedd

Guest Tim I.
Good stuff. I have seen some members using silkspan and modelspan. Any thought on this material. I'm not familiar with thermal transferring paper. can you elaborate. How do you use textile adhesive with out making a mess? Is it diluted in any way?
Silk span is easy to work with. PVA glue works well and any glue that moves outside what you are trying to glue will dry clear. Also Rubber Cement works well, if applied sparingly. Here are some sails I have done using silk span. Nothing to write home about, but my first attempts at sail making.
I use strips of silk span to simulate seams and sail detail and work them up in layers. You can also add bolt ropes and reef points to add more detail. I did not go into a lot of detail with these, rather kept them simple to work on my technique. Also if you use PVA a good idea is to press the sails between some parchment paper and heavy books while drying to prevent buckling or bubbling of the thin strips of silk span.

I hope this helps.
I like the look of the silkspan and the layering of the cloth details. What weight silkspan do you use?
Not quite sure on the weight. I just bought what my local hobby store has. This Silk Span in my pictures is the "SGM White".
Hope this helps,

A question about silkspan. Can it achieve the draped and folded look of clewed up sails? Or will it be too stiff? I want to show my ship in the process of reducing to battle sail.
Laissez le bon temps rouler !
Current Build: Le Soleil Royal
Completed Build : Amerigo Vespucci
Just saw this while looking for a source for Sig Silkspan, source of quote is the Stuntbarn an RC Forum:
"Title: Silk Span Covering
Post by: ericrule on October 22, 2012, 12:10:29 PM I just got off the telephone with Sig Mfg where they informed me that they will no longer have silk span available. At the present time they have only OO (Light) in stock and when that is gone they will no longer be able to obtain it.
According to the person I spoke to the company that supplied the silk span is out of business and they can not find any other supplier. Mike is searching for a new source but it does not look like he is having any luck."
So not sure if real or not....? But if true silkspan may not be around loong??
Just saw this while looking for a source for Sig Silkspan, source of quote is the Stuntbarn an RC Forum: "Title: Silk Span Covering Post by: ericrule on October 22, 2012, 12:10:29 PM I just got off the telephone with Sig Mfg where they informed me that they will no longer have silk span available. At the present time they have only OO (Light) in stock and when that is gone they will no longer be able to obtain it. According to the person I spoke to the company that supplied the silk span is out of business and they can not find any other supplier. Mike is searching for a new source but it does not look like he is having any luck." So not sure if real or not....? But if true silkspan may not be around loong?? Tom
That is what my local hobby store told me as well. That is why I bought out everything they had, for stock.
Oh noooooooooooooooooooooooooo !!!!! Say it ain't so.
Thank you all this is good stuff. I hope I can still get silk span I would like to try it out.

Landlubber Mike
Is there a difference between silk span and model span? I have a roll of model span, but haven't tried using it yet.
Current Wooden builds: Amati/Victory Pegasus MS Charles W. Morgan Euromodel La Renommèe
Plastic builds: Hs129B-2 1/48 SB2U-1 Vindicator 1/48 Five Star Yaeyama 1/700 Pit Road Asashio and Akashi 1/700 diorama Walrus 1/48 and Albatross 1/700 Special Hobby Buffalo 1/32 IJN Notoro 1/700 Akitsu Maru 1/700
Completed builds : Caldercraft Brig Badger Amati Hannah - Ship in Bottle Pit Road Hatsuzakura 1/700 Hasegawa Shimakaze 1:350
F4B-4 and P-6E 1/72 Accurate Miniatures F3F-1/F3F-2 1/48 Tamiya F4F-4 Wildcat built as FM-1 1/48 Special Hobby Buffalo 1/48 Eduard Sikorsky JRS-1 1/72
Citroen 2CV 1/24 - Airfix and Tamiya Entex Morgan 3-wheeler 1/16
Terminated build: HMS Lyme (based on Corel Unicorn)
On the shelf: Euromodel Friedrich Wilhelm zu Pferde; Caldercraft Victory; too many plastic ship, plane and car kits
Future potential scratch builds: HMS Lyme (from NMM plans); Le Gros Ventre (from Ancre monographs), Dutch ship from Ab Hoving book, HMS Sussex from McCardle book, Philadelphia gunboat (Smithsonian plans)
I believe its just a different brand butt lets let the experts handle that question.
For what it's worth I got a big roll of model span last year from CornwallModelBoats.
Steven, if you're interested in furled sails, I shared my techniques that I used on my Badger in a separate thread:
http://modelshipworld.com/index.php/topic/3944-landlubber-mikes-technique-for-furled-sails/
- 2 months later...

jablackwell
Those looking for SilkSpan can still find it at the Guillow model airplane homepage. It can be found under the spare parts section. Each model plane has a spare parts assortment, and the wing covering is an option for most.
U.S. Brig Syren - 1803 - Model Shipways - First PoB Build
Sopwith Camel F.1 - 1916 - Model Airways - Not a Ship! , Completed
Kate Cory - 1856 - Model Shipways - Second Build, completed
Sultana - 1767 - Model Shipways - First shipbuild, completed

There's more on using SilkSpan for sails in a new booklet by SeaWatchBooks, or as a new chapter in a new edition of Swan IV.
- EricWilliamMarshall
Be sure to sign up for an epic Nelson/Trafalgar project if you would like to see it made into a TV series http://trafalgar.tv
- 1 month later...

Jolley Roger
For what it's worth I got a big roll of model span last year from CornwallModelBoats. Steven, if you're interested in furled sails, I shared my techniques that I used on my Badger in a separate thread: http://modelshipworld.com/index.php/topic/3944-landlubber-mikes-technique-for-furled-sails/
Can you recall under what product name CMB was selling the model span?
I've been unable to find it on their site.
Samuel Pepys notes in his diary on 19 July 1667: "the Dutch fleets being in so many places, that Sir W. Batten at table cried, By God , says he, I think the Devil shits Dutchmen."
I can't find it on the website either. I'm fairly certain it was under building materials or something and listed as Modelspan. I looked at the packaging, and it had the Mantua name/emblem on it, but I don't see it under the Mantua fittings. Maybe email them and ask?
Thanks Mike, i'll send them a mail.
I am a passionate advocate of including sails on models so I am pleased you are making the decision to include them on your model.
I had a look at your Victory build log, those sails looks fantastic!
I think I will follow your method when I get to that part on my build.

Richard Griffith
Bluejacket Shipcrafters ran out of silkspan recently but they substituted model span which to me is the same material. I used it to added furled sails to Le Superbe. I am a very happy customer of BJ, not an employee.
- MrBlueJacket , Canute and Landlubber Mike
I'm just using old worn bed sheets for my 1/100 scale HMS Victory. Check out my build log which is really not much at all about building the kit and mostly focussing on how I am making the sails. I bet if you searched through all my comments on MSW you would find 1/2 of all my posts are having to do with sails or rigging. I am a passionate advocate of including sails on models so I am pleased you are making the decision to include them on your model. I don't think the thickness of the material is that big a deal as long as the texture of the weave is fine enough not to draw attention to itself. Many very convincing ship model sails have actually been carved out of wood. My build log goes into a lot of detail on these points but I will just set them out here again: Don't use pure white sails, this will look too stark and in fact actual sails were cream colored or very light grey.(staining with coffee is super easy and very effective) Don't sew the boltropes on, no matter how fine a thread you use, it will look out of scale. Just glue them on. Do include sail construction details like reef bands and reinforcing patches, these give a good texture and are realistic. Look at all the photos you can find of reproduction ships that resemble your ship and try to duplicate that look.
JCFrankie, thanks so much for your detailed log on your sail techniques. I went with furled sails on my Badger, but was planning on doing a mixture of furled and unfurled on my Pegasus and future builds. Your results are fantastic, and I will certainly bookmark your log for when I get to that point! I experimented with tissue and a few other materials as well, but ended up with cloth as well.
Once again, a big thank you!
- 3 years later...
Hi I am making sails for a large pond yacht which will of course become very wet , if I chose a material that becomes too wet and heavy that will cause problems,
what is the best material to use
for a large expanse of sail.
My pond yacht is 5ft long not inc
bow sprit.
Join the conversation
You can post now and register later. If you have an account, sign in now to post with your account.
× Pasted as rich text. Paste as plain text instead
Only 75 emoji are allowed.
× Your link has been automatically embedded. Display as a link instead
× Your previous content has been restored. Clear editor
× You cannot paste images directly. Upload or insert images from URL.
- Insert image from URL
- Submit Reply
Recently Browsing 0 members
- No registered users viewing this page.
Modelshipworld - Advancing Ship Modeling through Research
SSL Secured
Your security is important for us so this Website is SSL-Secured
NRG Mailing Address
Nautical Research Guild 237 South Lincoln Street Westmont IL, 60559-1917
Model Ship World ® and the MSW logo are Registered Trademarks, and belong to the Nautical Research Guild (United States Patent and Trademark Office: No. 6,929,264 & No. 6,929,274, registered Dec. 20, 2022)
Helpful links.
- Articles Database
- NRG Home Page
- NRG Online Store
- Important: Our Guidelines
- Terms of Use
- Buildlog Index
About the NRG
If you enjoy building ship models that are historically accurate as well as beautiful, then The Nautical Research Guild (NRG) is just right for you.
The Guild is a non-profit educational organization whose mission is to “Advance Ship Modeling Through Research”. We provide support to our members in their efforts to raise the quality of their model ships.
The Nautical Research Guild has published our world-renowned quarterly magazine, The Nautical Research Journal, since 1955. The pages of the Journal are full of articles by accomplished ship modelers who show you how they create those exquisite details on their models, and by maritime historians who show you the correct details to build. The Journal is available in both print and digital editions. Go to the NRG web site (www.thenrg.org) to download a complimentary digital copy of the Journal. The NRG also publishes plan sets, books and compilations of back issues of the Journal and the former Ships in Scale and Model Ship Builder magazines.
Our Emblem ®
Nautical Research Guild ® and the NRG logo are Registered Trademarks, and belong to the Nautical Research Guild (United States Patent and Trademark Office: No. 6,999,236 & No. 6,999,237, registered March 14, 2023)
- Existing user? Sign In
- Latest Posts
- All unread content since my last vist
- Unread topics I have posted in
- Create New...
- Recent Orders

Sails & Sail Cloth

Sail Cloth for Modern Yacht

Sail Cloth for Period Ships

Mantua Sail Cloth
Best sellers.

New Products

Recently Viewed
- Fair American
- Tools and Techniques
- Kit Database
- Bluenose Canadian Schooner
Making Sails for Model Ships
December 3, 2017
On my Model Shipways Bluenose build , I debated whether or not to make the sails. Many (most?) ship models do not include full sails. The Model Shipways kit was designed with sails, and includes the sail cloth as part of the kit. The inclusion of sails was actually one of the factors that led me to select this kit for my second build.
With the booms and gaffs rigged and installed, I would basically be finished with the build if I omit the sails. The remaining rigging is all attached to sails, so I’d leave it off if I didn’t include sails. However, the sails really do add something to the model, especially for a schooner like this.
So, I decided to make sails. I’ve never made sails before, so this will be a learning experience. Here’s how I ended up doing it…
Choosing How Sails are Displayed
An important decision to make before you start is how you’ll be displaying sails. There are three different ways you can go:
- For Display
(I made those last two names up).
Furled sails are sails that are lowered. Many modelers choose to do furled sails on their ships. The advantage is that the sails don’t cover everything up and make a model look like a bunch of cloth. When doing furled sails, you typically don’t make the full sail, instead making smaller version. The sail is put in place, but is bunched up and tied to the appropriate boom or gaff.
Realistic sails try to show the sails rigged and set as they would be while the ship is actually at sea. Ships adjusted their sails depending on the situation. In most cases, some sails would be raised while others would be lowered. Some sails might be set off to one side. Realistic sails would try to show the ship in some kind of ‘real’ sailing state.
Making sails simply ‘for display’ is what I’m doing. I’m making all the sails, and installing them all in their raised state. I’m not going to set any sails off to the sides – everything is just going to be installed straight and even. You’d probably never see a ship at sea actually set like this, but I think it works well for a model.
When to Make Sails
From what I can tell, the general practice is to make the sails before rigging and installing the booms and gaffs. Several of the sails need to be laced onto the booms and gaffs, and that is nearly impossible to do directly on the ship.
The standard process seems to be:
- Build the booms and gaffs.
- Make the sails based on the plans.
- Attach sails to the booms and gaffs as appropriate.
- Install and rig the booms and gaffs.
- Add the additional rigging for each sail.
I’m not confident that all my booms and gaffs are 100% accurately sized, and I suspect that the dimensions of my sails might need to be adjusted to fit my particular ship. So, I intentionally put off making sails until I had installed all the booms and gaffs.
Once I had everything installed on the ship, I could make templates for the sails that take into account both the plans and the size/shape of my actual build.
Of course, this means that I had a bunch of rigging for the booms and gaffs that would need to be un-done so the booms and gaffs could be removed. That was fine with me, because I had avoided the use of glue when securing the rigging. Everything was either tied off (easy to un-tie), or attached with a hook or shackle (easy to remove).
So, my process is:
- Build the booms and gaffs .
- Install and rig the booms and gaffs .
- Make the sails based on the actual layout of my ship.
- De-rig the booms and gaffs, and remove them from the ship.
- Re-install the booms and gaffs, and their rigging.
For me, this approach (while more work) has several advantages:
- Initially, I’m able to focus on getting the booms and gaffs properly installed and rigged, without the sails getting in the way.
- I can start with sail templates based on the plans, and adjust as necessary to fit the exact size/shape of my ship.
- Once sails are ready to install, I can quickly get them rigged without spending any time on the other rigging for the booms and gaffs, since those runs are already done and just need to be re-tied/attached.
Paper Templates
Making the actual sails starts with making paper templates. Some of the sails were too big to use normal paper, so I picked up a roll of white craft paper.
For each sail, I took a piece of paper and laid it over the plans. I marked the corners of the sail, then used a ruler to draw lines between the marks, giving me the outline of the sail. Some sails have curves that I had to hand-draw.
Once the shape was laid out on the paper, I cut the paper to shape.

A paper template for the jib sail.
Next I positioned the paper template on the actual ship in the correct spot. I took note of anything that didn’t fit just right, and adjusted the template as necessary. Some sails needed to be made slightly smaller, while some had to be made slightly larger.
To help me visualize the sail, I also marked where the hems on the edges will go, along with any other key elements of the sail. For the edge hems, I’ll be folding the fabric over and sewing it. I’ll be shooting for a 1/16″ hem, so I used that size for the markings on the template.
The actual sails on the ship were made from strips of cloth, not one big piece. To simulate this, I’ll just be sewing lines onto the cloth. For some of the sails, I went ahead and marked these lines on the template since they need to be oriented correctly according to the plans.
The main and fore sails also have reef bands , which run horizontally along the lower portion of the sail. These were marked as well.
Preparing the Sail Cloth
Once I was satisfied with the template, I got out the sail cloth. Model Shipways includes sail cloth with the kit. This cloth is a medium weight cotton cloth in an off-white color. The kit includes enough to make all the sails, assuming you get everything right on the first try. I knew that wasn’t going to work, so I ordered two more packages of sail cloth from them. It was relatively inexpensive – about $7 for each package of cloth.
Sails on a ship were rarely bright white. I’ve seen that many modelers will dye their sail cloth to get a desired shade. There are many tricks for this, like dipping the material in coffee. I felt that the off-white color of the Model Shipways cloth was fine, so I didn’t dye my cloth.
If you’re wanting to use other sail cloth, look for something lightweight. Almost all fabric is going to be too thick and out of scale, so just do the best you can. I actually used some fabric from a local hobby store for a few ‘test runs’, and learned a few things. Look for fabric with a tight knit, so the fabric doesn’t start to come apart as you cut it. Also look for something without too much stretch, as stretchy fabric can distort the shape of the sails as you sew them.
Ideally, you want to wash, dry, and iron the sail cloth before you start. Most fabric will shrink a little during this process, so you want this out of the way before you start cutting things to size. Doing this will also release any wrinkles in the fabric. (I was too excited to get started, and didn’t do this.)
Once you’ve got your fabric ready and your template sized, you’re ready to cut some fabric.
I used a fabric marker to do all the markings on the fabric. I picked this up at a local hobby store in the sewing section for a couple dollars. This marker uses special ink that disappears as it evaporates. This means I can draw all over the fabric, and within a few hours the ink is gone. I found this to give much better results than using a pencil and trying to erase markings.

The paper template is used to mark up the fabric being used for the sail.
A note on marking fabric…since I’m going to be folding over the edges of the sail to create hems, one side of the sail is going to look better than the other. Often, you pick a ‘display side’ of the ship, and put ugly stuff (like the worse sail side) so it isn’t visible from the display side. I found that with the way I was marking, folding, and sewing the cloth, I wanted the markings on the display side. Making sure I marked the display side ensured that I as I worked I ended up with all the ugly stuff on the back.
First the outline of the sail is marked on the fabric. Be sure to leave extra space on all sides outside of the sail.
A second outline is made 1/16″ outside of the first outline. This is the hem that I want to end up with on the finished sail.
A third outline is made 1/2″ outside of the second outline. This one doesn’t have to be perfect…this is just a guide for cutting the fabric.
You can also mark the reef lines and strips at this point if desired. I typically didn’t mark the strips, since I was able to position those accurately using my sewing machine.

The fabric is trimmed, leaving excess material around the edges.
Once everything is marked, I cut the fabric along the outer-most outline. I used a rotary cutter (like a pizza cutter), which gave much better results than scissors.
To make sails you have to do a lot of sewing. I have no experience sewing. Doing all this by hand with a needle and thread was not practical, so I bought a cheap little ‘hobby’ sewing machine. That machine was junk, and broke within the first 20 minutes. Since I’m hoping to keep this hobby going for a few decades, I decided to go ahead and invest in a real sewing machine.
At my local hobby store, the staff helped me select a good quality machine. I got it for under $200. The advantages of a real machine include:
- It won’t jam.
- Variable speeds.
- Selectable stitch length and width (critical for trying to get the stitching remotely close to ‘scale’).
- Many different computer-controlled stitch types, so you can do more than just a simple straight stitch. This would end up making the reef bands much better.
It took me a few hours to get the hang of using the machine, but my skill level increased quickly. While I certainly couldn’t sew a shirt or a pair of pants, by the second or third sail I was flying along like a pro.
Since you’ll be sewing, you’ll need thread. There are three main considerations with the thread.
First is the color. This is a matter of personal preference. I’ve seen some models where the stitching on the sails was very high-contrast (dark brown thread on white cloth). I’ve also seen some where the thread was the same color as the cloth. I felt like the stitching shouldn’t stand out too much , and I wanted to rely on the texture of the thread to define the lines rather than the color. So, I went with a ‘natural’ color thread that ended up being really close to the color of the cloth.
The second consideration is the thread material. A hobby store will likely have hundreds of different kinds of thread. There are synthetic materials and natural materials. I went with a cotton thread. Why? No really good reason except that all my rigging lines are cotton and the sail cloth is cotton, so it seemed like a good idea.
The final consideration is quantity. I have no idea how to predict the amount of thread that will be needed (there may be some ‘trick’ to it that the pros know). Initially I bought one spool of the thread. That only made two sails. When I went back to by more, they were out of that exact thread, so I had to order more online. That caused a week delay in making sails. Obviously you wan the thread to be the same on all the sails, so buy a lot of the same thread up front. Thread is cheap, and it is better to have some leftover than to run out.
Sewing the Edges
On to sewing.
The first step is to sew the hems on the edges. I start with the longest edge first, then do the opposite edge, continuing on until all edges are sewn. The cloth is folded over at the first outline (the line that defines the actual edge of the sail) and pinned into place. The 1/16″ line that indicates the edge of the hem should be inside the sail. Since the cloth was cut 1/2″ past that line (on that third outline), there is some extra material here that makes pinning easier. I’ll cut that off later.

The edges are folded over to create a hem and pinned in place.

The hem is sewn on the edge.
The cloth then goes into the machine and gets stitched up. I used the machine’s reverse feature to double-stitch the first couple stitches to secure the thread, then just ran a straight stitch down the edge, staying between the edge of the sail and the 1/16″ hem marking. I used a small stitch length so things weren’t too out of scale.

My machine lets me set the position of the needle, allowing me to get really close to the edge.
Once the stitch was complete, the extra thread was clipped off. I used a pair of sharp scissors to carefully cut off the extra cloth along the 1/16″ hem line.

A completed edge hem, about 1/16″ wide.
This was repeated for each edge.

Two edges meet in a corner.
Adding ‘Strips’
To simulate the strips of material, some modelers simply draw lines on the cloth. I decided to run a stitch for each strip instead. It is more work, but it goes pretty fast

The ‘strips’ of sail sail cloth are simulated with stitches. Each sail has a unique strip layout shown on the plans.
The width of the strips is indicated on the plans, as well as the layout of the strips. It turned out that the width of the strips matched with space between the needle on my sewing machine and the edge of the ‘foot’. So I didn’t need to mark the strips on the fabric – I just positioned the fabric under the foot and ran the material through the machine.
Reef Bands and Points
The large lower sails (main sail and fore sail) have reef bands . These are horizontal bands across the sails. My sewing machine has a setting that creates a stitch that looks like a ladder (or railroad tracks?). I adjusted the stitch length and width to get the desired size, then ran this stitch across the sail to create the reef bands.
I ran this right over the strip lines. This is easier than doing the reef bands first and trying to start/stop the strip lines at the bands, and you can’t really tell the difference.

Reef bands were sewn in using a different stitch pattern on my machine.
At each point where a strip line crosses the reef band, there is a short rope that goes through the sail. These ropes were used to secure the sail when it was lowered and bundled up. I cut a bunch of 1″ long pieces of 0.008″ tan rigging line and punched them through at the appropriate spots. I used a small bit of fabric glue on each side to keep these ropes flat against the sail instead of sticking out.
Corner Attachment Points
The sails typically have rigging lines attached to the corners of the sails. This means you need something in each corner to attach a rigging line to. From my research, it looks like most sails had a rope that ran around the outside edge of the sail, and that rope would form an eye at the sail corners to create the attachment points.
I decided not to add this rope. I wasn’t confident I could make it look good, and I thought the tan line would stand out too much.
So, I simply sewed brass rings (made from wire) into each corner. This was done manually with a needle and thread.

Anchor points in the corners were made from brass wire and sewn in.
Finishing Up
Once everything is sewn and I’m happy with the results, there are a few final steps.
I do a final pass to trim anything that looks bad (edges of hems, loose threads, etc.).
After all my disappearing fabric markings have evaporated and disappeared, I iron the sail to flatten it out and remove any remaining wrinkles.
Finally, I use some fabric glue along any exposed fabric edges (like the hems) to keep them from fraying. I also use a little fabric glue on the ends of stitches to ensure they don’t come loose.
Then the sail is ready to install!

A few completed sails on the ship.
- Click to share on Twitter (Opens in new window)
- Click to share on Facebook (Opens in new window)
- Click to share on Reddit (Opens in new window)
- Click to share on Tumblr (Opens in new window)
- Click to share on Pinterest (Opens in new window)
- Phantom NY Pilot Boat
- Model Ship Kit Database
Copyright © 2018 SuburbanShipModeler.com The text, photos, and content are copyright of this site unless otherwise noted.
Photos were taken by the author unless otherwise noted. All brands and trademarks referenced are the property of their respective owners.
Discover more from The Suburban Ship Modeler
Subscribe now to keep reading and get access to the full archive.
Type your email…
Continue reading
CPM 505 Sailcloth
Header content region, insert text, image or banner ads here, or just delete this text and leave this area blank.

1/25 (36") Scale America's Cup high performance model sailboat
5ft Replica of the 1962 Americas Cup 12 Meter
45" Scale Model of the Olympic Star Boat
J Class Boat-Shamrock V
1/16 (8'-10')Scale Replica of the 1930's America's Cup Class Yacht
RMG Sail Winches
High Performance sail control winches

- Create as many news links as you need. News links are simple bullet lists.
This is where you would add your text, images, or advertising banner

Chesapeake Performance Models announces the production and availability of CPM 505 (also known as Test 505)
For those of you that are not familiar with Test 505, 18-20yrs ago there was a sailcloth that was made called TEST 505.
It is a Mylar/scrim laminate that has the advantage of being very light and very strong. The cloth was unique in that it is very stable over a wide range of wind strengths while holding its shape over 360 degrees of load. Other laminates are prone to elongate at +-45 degrees. Test 505 also has a very smooth surface when compared to other laminates and while it could not take the abuse of big boat sailing it was perfect for our hobby. Unfortunately as is often the case is was only put into limited production and soon became unavailable. After over two years of work David Ramos of Chesapeake Performance Models (CPM) in association with Chuck Luscomb and Ernest Freeland finally put all of the pieces together to make this sail cloth available again under the new name CPM 505. The cloth was made in a 60" width a cost of $25/yd. CPM received the first production run of CPM 505 in late 2007 and have had fantastic regatta results. The '07 and '08 EC12 Meter Nationals and the Star 45 Nationals were all won using CPM 505. As the popularity of the CPM505 has grown and the race results have come to show, this cloth makes very fast sails. The demand has been so great that CPM has had to make another production run. We are just received the latest production run of CPM-505 and now have it in stock again.

Copyright © 2021. Chesapeake Performance Models LLC. All Rights Reserved..
- Join Newsletter & Get 10% Off Your First Order
Join / Login
Modelers Central offers the largest range of decorative sail sets for wooden model ships & wood model boats – plus 100’s of decorations, accessories & fittings available. Modelers Central is the no.1 destination for model ship builders & model boat builders worldwide.
Filter Products
Showing all 25 results

Sail Cloth – General Purpose – 19-1/2″ x 27-1/2″ (500x700mm)

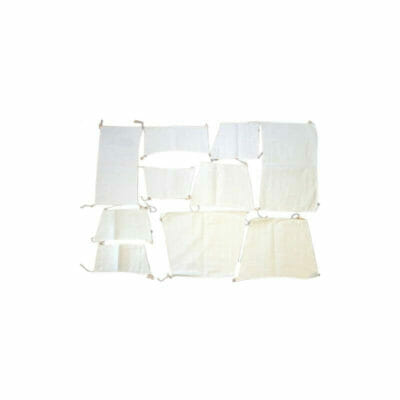
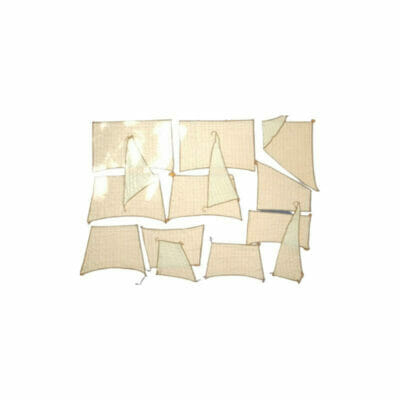
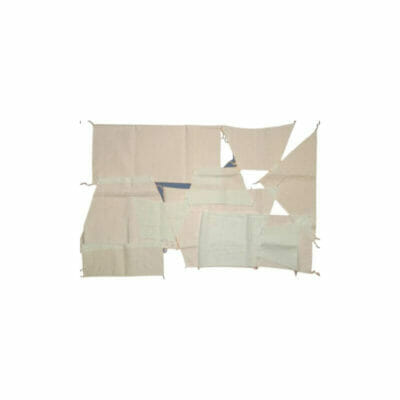
Sail Set – HM Endeavour
Sail Set – Sovereign of Seas

Sail Set – Cutty Sark

Sail Set – Wasa
Sail Set – Amerigo Vespucci 1:100 Scale
Sail Set – HMS Victory 1:98 Scale
Sail Set – HMS Victory 1:78 Scale
Sail Set – Berlin
Sail Set – HMS Unicorn
Sail Set – Half Moon
Sail Set – Lady Isabella

Sail Set – San Felipe
Sail Set – Gorch Fock

Sail Set – HMB Endeavour
Sail set – hms bounty, sail set – golden hind.

Sail Set – Alert
Sail set – flying fish.
Sail Set – Royal Yacht Caroline
Sail Set – Prins Willem
Sail Set – Wappen Von Hamburg
Sail Set – HMS Victory

Sail Set – Couronne
Sail Set – Dolphyn
Join 18,543 other modelers to hear about specials, new products and modeling tips
- Become a Member
- Modeling Hub
- Model Ship Building
- Maritime History
- Affiliate Program
Information
- Terms & Conditions
- Privacy Policy
Copyright © 2023 Modelers Central. ABN: 31 114 830 732
- Claim 10% Off First Order
- Get 5% off ALL orders with a Membership
- Gift Vouchers
- Help & Advice
Modelers Central. 2023, All rights reserved.
- Claim 10% Off Your First Order
- Get 5% Off All Orders With A Membership
Get 10% off
Your first order.
10% off applies only to full-price items. By providing your email address, you agree to our Terms & Privacy Policy
10% off applies only to full-price items. By providing your email address & mobile number, you agree to our Terms & Privacy Policy and consent to receive marketing messages from Modelers Central at the addresses provided. You can unsubscribe at any time by replying STOP.
- Classifieds
- Remember Me Forgot Password?
- Boats Sailboats Question Sail material???
| | |
| . | |
| |||||||||||||||||||||||||||||||||||||||||||||||||||||||||||||||||


IMAGES
VIDEO
COMMENTS
Sail material used for premium quality Sailboat RC sails, select any thickness and colours you want, we recommend translucent for best performance.
Amazon.com: Model Expo Sail Cloth, 18 X 36 (457 X 915MM) MS0567 Medium Weight Cotton from for Model Ship Building : Arts, Crafts & Sewing ... Waxed Cotton Rigging Thread Choice of Colour/Size Model Boat Fittings (0.3) $5.99 $ 5. 99. Sold by magi's gift and ships from Amazon Fulfillment. +
The more experienced the sail maker gets the better the sails work. This guide is intended to help newbies to cut heir own sails and build their own rigs. Sailmaking Tips: A piece of thin melamine board about 50x200cm is very helpful to loft the outline of the sails. Use packing paper to sketch the outlines according the class rules or a ...
Work step by step. 1.Make paper stencil for each sail and check it's dimensions on your model. 2.With soft pencil transfer all lines in to fabric - add stripe 5-7 mm around. sail edges. 3.Make all necessary lines on fabric using sewing machine and thin thread with light brown or beige color.
Home Craft & Boat Fittings Scale Model Fittings Sails & Sail Cloth. Sails & Sail Cloth. Sail Cloth for Modern Yacht . In stock. £8.99 each (inc. VAT at 20%) Sail Cloth for Period Ships ... Mantua 34360 Rigging Thread Hemp 0.50mmx10mtr- Model Boat Fittings. £3.00 each. Caldercraft Eyebolt M2 Ball Diameter 3.8mm. £1.75 each. Vallejo Model ...
Sailmaking Materials. Sail Identification. Welcome to Midwest Model Yachting your source for R/C Model Sailboat Fittings from around the world. Shop. Product Index. Category Index. Information. Terms and Conditions. Product Index.
Preparing the Sail Cloth. Once I was satisfied with the template, I got out the sail cloth. Model Shipways includes sail cloth with the kit. This cloth is a medium weight cotton cloth in an off-white color. The kit includes enough to make all the sails, assuming you get everything right on the first try.
1/25 (36") Scale America's Cup high performance model sailboat. View Page. EC12 Meter. 5ft Replica of the 1962 Americas Cup 12 Meter. View Page. Star 45. 45" Scale Model of the Olympic Star Boat. View Page ... in association with Chuck Luscomb and Ernest Freeland finally put all of the pieces together to make this sail cloth available again ...
Sail cloth. I'm starting to think about sails for my boat. I was planning on using .75oz ripstop nylon, but I called a sailmaker to ask about colours, and they said not to use nylon. They recommended a 2.6oz dacron, called Polykote from Contender Sailcloth. It's still pretty lightweight in the scheme of things, but much stiffer, almost like a ...
Sail Sets. Modelers Central offers the largest range of decorative sail sets for wooden model ships & wood model boats - plus 100's of decorations, accessories & fittings available. Modelers Central is the no.1 destination for model ship builders & model boat builders worldwide.
Sport kite shops used to carry good cloth for sail making, but its been some time since I saw one in my area. you've givin me some ideas Id forgotten all about!! thanx Apr 01, 2016 , 11:53 AM
Hobby Model Yacht Sails And Supplies. Sail Making RC Mylar Sails. Sail Makers Block Wing. Mylar Film Insignia Tape Kikusui Tapes Eyelets. Supplier of Hunter Mylar Polyester Sail Film. Inspect our site for your sail making needs. Hunter Mylar. 36 - 50 - 75 Micron in 400mm and 600mm wide ...
Small brass cotter-puns are glued into holes every 6" down the aft side of the mast. Then you lay out the sail next to the mast and carefully cut small windows out of the luff of the sail at each cotter-pin. You leave a small amount of room both above and below the cotter pin for the sail to stretch as you apply downhaul.
Boats 55, 2364, 10, 24, 557, and 2614 all using WJ Sails Soling 1M White Sails at 2010 NCRR. Photo by Tom Evens Membrane Technology is where sails are created over full-sized 3-dimensional molds by sandwiching a scrim cloth and a yarn layout between two thin Mylar films, then heat fusing everything to make a single cloth-like sail.
A Remote Control Sailboat that is fast, powerful, affordable, and fun to build. The T37 RC Racing Sloop is 37 inches long, 5 feet high, and has a total weight of 4 pounds with the keel ballast casting weighing 2 of these pounds. There are more than 3000 T37 RC Sailboats sailing today, some in countries as far away as Thailand and New Zealand!
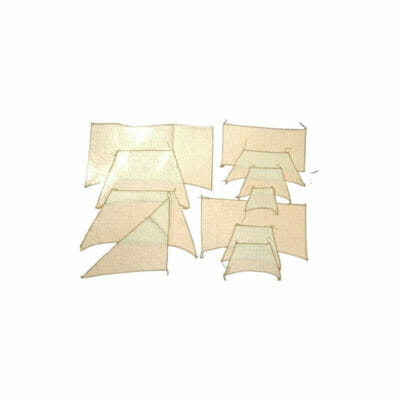
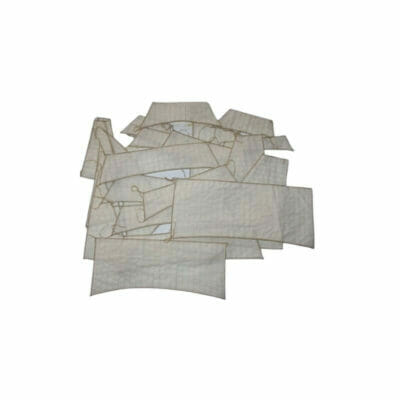
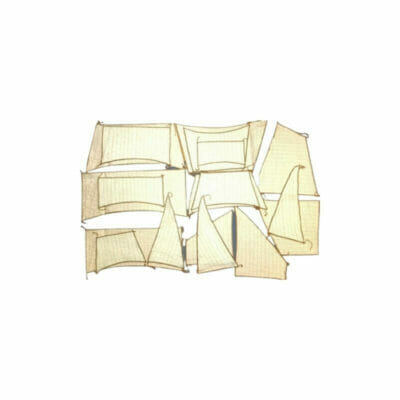
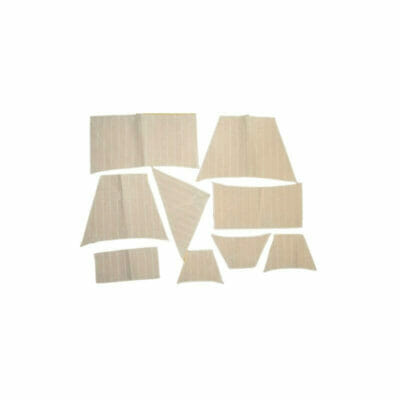
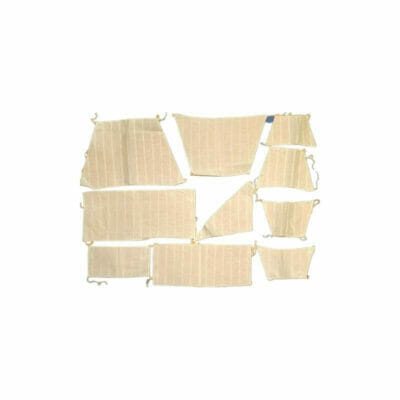
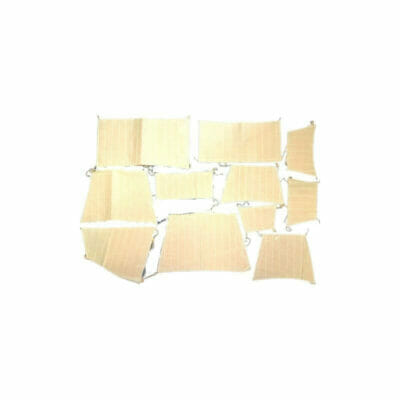
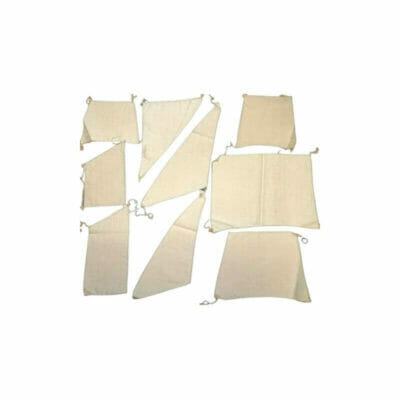
Whatever your age or experience level, you'll be able to find something to pique your interest at Hobbies. If there is anything you need help with, or even just a general enquiry, then please Contact Us. 400 x 800mm beige sail cloth for model ships. This beige sail cloth is the perfect feature for your model boat, enhancing its realism.
Sail Sets for period ship models Read more. Mantua Model UK Ltd 01753 856321 [email protected] ... 34000 Sail Cloth Jamaica Sails. £39.00. 34003 Sail Set Jamaica H.M.S. Bounty Sails. ... Mantua Model UK Ltd 179 Dedworth Road Windsor Berks SL4 4JN. Tel: 01753-856321.
Batten Material - Medium. $8.38. Sail Reinforcement and Deck Patch Material 685 mm x 375 mm "White". $7.75. Sail Reinforcement and Deck Patch Material 685 mm x 375 mm "Red". $7.75. Sail Reinforcement and Deck Patch Material 685 mm x 375 mm "Blue". $7.75. Sail Reinforcement and Deck Patch Material 685 mm x 375 mm "Black".
Sailcloth. Make your own sails and much more with high-performance sailcloth sold by the yard from Sailrite's excellent selection. Choose from ripstop and Dacron® sailcloth in a variety of colors and weights. Fabric samples available. Stay in the loop! Never miss sale announcements, how-to blogs, new product launches, helpful tutorials and more!
You've come to the right place!!The SSMA is an association of local Ship Model Building clubs and individuals located throughout North America. Our members build all sorts of models:- Radio Controlled models using electric, sail, or steam power.-. Plastic and wooden static models. We build models of all sorts of subjects-- from small boats up ...
is to put it in reverse when under sail. This came from the best diesel mechanic in our area. He's the guy that works on most of the boats including the ferry and cruise boats here. I don't know if the make and model make a difference. Ours is a Universal M25. Hope this helps!
SOLING 1 METER. Class contact information. Click below. Class Email. Class Website. One-Design Class Type: Radio Control. Was this boat built to be sailed by youth or adults? Both
RC Tanks - Event at the T-34 tank museum, Moscow - I will add a few more recent events. Event at the T-34 tank museum, Moscow, 09/12/2020. ... cars, helis, boats; RC Humor; Model Rockets & Rocketry; RC Robotics and Autonomous Robots; Toy-Grade RC Products; Unusual R/C; Aerial Photography and Video; Digital Camera & Photo Editing; Digital Video ...