- Construction
- Maintenance

How Much Does It Cost to Replace Standing Sailing Rigging?

Share This Post
When it comes to standing sailing rigging replacement cost, there is no one-size-fits-all answer.
The cost of replacing your standing rigging will depend on a variety of factors, including the size and type of boat, the age and condition of the rigging, and the materials used in the replacement process.
In this blog post, we will provide an overview of the factors that affect standing rigging replacement costs, as well as some ballpark estimates for what you can expect to pay.
Cost Factors
One of the most important factors in standing rigging replacement cost is the size of your boat. Larger boats will require more material and labor to replace their standing rigging, and as such, will typically have higher costs.
Additionally, the age and condition of your standing rigging will also affect the cost of replacement. If your standing rigging is old or in poor condition, it may need to be replaced with a higher-quality product, which will also drive up costs.
Finally, the materials used in standing rigging replacement can also affect costs. Most standing rigging is made from stainless steel wire or rod, but some manufacturers offer alternatives made from other materials like carbon fiber or Kevlar.
These alternative materials can sometimes offer advantages in terms of weight or performance, but they also come with a higher price tag.
Ballpark Estimates
With all of these factors in mind, what can you expect to pay for standing rigging replacement?
For a small boat (under 30 feet), you can expect to pay anywhere from $500 to $2000 for standing rigging replacement. For a medium-sized boat (30-50 feet), the cost will be somewhere between $2000 and $4000.
And for a large boat (over 50 feet), you should budget for at least $4000, and potentially much more depending on the size and condition of the vessel.
Of course, these are just ballpark estimates, and your actual costs may vary.
Can You Do It Yourself?
For many boat owners, standing rigging replacement is a job that is best left to the professionals. The process can be complex and dangerous, and it is important to make sure that the job is done correctly in order to avoid serious safety risks.
However, if you are experienced with working on boats and are confident in your ability to handle the project, you may be able to save some money by doing the work yourself.
If you do decide to tackle standing rigging replacement on your own, be sure to do plenty of research ahead of time and have a clear plan for how you will complete the project. You should also factor in the cost of any tools or materials that you will need to purchase in order to complete the job.

Hi, my name’s David. I started this pricing blog as a side project to help people figure out the best prices on common services. Whether you’re trying to figure out how much it costs to get scanning done at Staples or the expense to bleach short hair, more than likely I’ve blogged about it. Shoot me an email if you have any questions: [email protected].
Related Posts
Fat transfer breast augmentation cost: what to expect, how much does it cost to get your ears pierced at claire’s, how much does property preservation cost [price stats], how much does a pipe organ cost [price stats], how much do butterfly doors cost, the cost of charging a golf cart: how much does it actually cost.
MightyPricey is all about researching pricing. We provide in-depth analysis and commentary on pricing trends, strategies, and news. Our goal is to help you make informed decisions about what you buy and how much it costs.
- Privacy Policy
- Terms Of Service
How Much Does It Cost to Get a Copy of Your Naturalization Certificate?
How much does it cost to replace an oil pan gasket: what you need to know, how much does it cost to flush a toilet: evaluating the true expenses.
No products in the cart.
Sailing Ellidah is supported by our readers. Buying through our links may earn us an affiliate commission at no extra cost to you.
The Standing Rigging On A Sailboat Explained
The standing rigging on a sailboat is a system of stainless steel wires that holds the mast upright and supports the spars.
In this guide, I’ll explain the basics of a sailboat’s hardware and rigging, how it works, and why it is a fundamental and vital part of the vessel. We’ll look at the different parts of the rig, where they are located, and their function.
We will also peek at a couple of different types of rigs and their variations to determine their differences. In the end, I will explain some additional terms and answer some practical questions I often get asked.
But first off, it is essential to understand what standing rigging is and its purpose on a sailboat.
The purpose of the standing rigging
Like I said in the beginning, the standing rigging on a sailboat is a system of stainless steel wires that holds the mast upright and supports the spars. When sailing, the rig helps transfer wind forces from the sails to the boat’s structure. This is critical for maintaining the stability and performance of the vessel.
The rig can also consist of other materials, such as synthetic lines or steel rods, yet its purpose is the same. But more on that later.
Since the rig supports the mast, you’ll need to ensure that it is always in appropriate condition before taking your boat out to sea. Let me give you an example from a recent experience.
Dismasting horrors
I had a company inspect the entire rig on my sailboat while preparing for an Atlantic crossing. The rigger didn’t find any issues, but I decided to replace the rig anyway because of its unknown age. I wanted to do the job myself so I could learn how it is done correctly.
Not long after, we left Gibraltar and sailed through rough weather for eight days before arriving in Las Palmas. We were safe and sound and didn’t experience any issues. Unfortunately, several other boats arriving before us had suffered rig failures. They lost their masts and sails—a sorrowful sight but also a reminder of how vital the rigging is on a sailboat.
The most common types of rigging on a sailboat
The most commonly used rig type on modern sailing boats is the fore-and-aft Bermuda Sloop rig with one mast and just one headsail. Closely follows the Cutter rig and the Ketch rig. They all have a relatively simple rigging layout. Still, there are several variations and differences in how they are set up.
A sloop has a single mast, and the Ketch has one main mast and an additional shorter mizzen mast further aft. A Cutter rig is similar to the Bermuda Sloop with an additional cutter forestay, allowing it to fly two overlapping headsails.
You can learn more about the differences and the different types of sails they use in this guide. For now, we’ll focus on the Bermuda rig.
The difference between standing rigging and running rigging
Sometimes things can get confusing as some of our nautical terms are used for multiple items depending on the context. Let me clarify just briefly:
The rig or rigging on a sailboat is a common term for two parts:
- The standing rigging consists of wires supporting the mast on a sailboat and reinforcing the spars from the force of the sails when sailing.
- The running rigging consists of the halyards, sheets, and lines we use to hoist, lower, operate, and control the sails on a sailboat.
Check out my guide on running rigging here !
The difference between a fractional and a masthead rig
A Bermuda rig is split into two groups. The Masthead rig and the Fractional rig.
The Masthead rig has a forestay running from the bow to the top of the mast, and the spreaders point 90 degrees to the sides. A boat with a masthead rig typically carries a bigger overlapping headsail ( Genoa) and a smaller mainsail. Very typical on the Sloop, Ketch, and Cutter rigs.
A Fractional rig has forestays running from the bow to 1/4 – 1/8 from the top of the mast, and the spreaders are swept backward. A boat with a fractional rig also has the mast farther forward than a masthead rig, a bigger mainsail, and a smaller headsail, usually a Jib. Very typical on more performance-oriented sailboats.
There are exceptions in regards to the type of headsail, though. Many performance cruisers use a Genoa instead of a Jib , making the difference smaller.
Some people also fit an inner forestay, or a babystay, to allow flying a smaller staysail.
Explaining the parts and hardware of the standing rigging
The rigging on a sailing vessel relies on stays and shrouds in addition to many hardware parts to secure the mast properly. And we also have nautical terms for each of them. Since a system relies on every aspect of it to be in equally good condition, we want to familiarize ourselves with each part and understand its function.
Forestay and Backstay
The forestay is a wire that runs from the bow to the top of the mast. Some boats, like the Cutter rig, can have several additional inner forestays in different configurations.
The backstay is the wire that runs from the back of the boat to the top of the mast. Backstays have a tensioner, often hydraulic, to increase the tension when sailing upwind. Some rigs, like the Cutter, have running backstays and sometimes checkstays or runners, to support the rig.
The primary purpose of the forestay and backstay is to prevent the mast from moving fore and aft. The tensioner on the backstay also allows us to trim and tune the rig to get a better shape of the sails.
The shrouds are the wires or lines used on modern sailboats and yachts to support the mast from sideways motion.
There are usually four shrouds on each side of the vessel. They are connected to the side of the mast and run down to turnbuckles attached through toggles to the chainplates bolted on the deck.
- Cap shrouds run from the top of the mast to the deck, passing through the tips of the upper spreaders.
- Intermediate shrouds run from the lower part of the mast to the deck, passing through the lower set of spreaders.
- Lower shrouds are connected to the mast under the first spreader and run down to the deck – one fore and one aft on each side of the boat.
This configuration is called continuous rigging. We won’t go into the discontinuous rigging used on bigger boats in this guide, but if you are interested, you can read more about it here .
Shroud materials
Shrouds are usually made of 1 x 19 stainless steel wire. These wires are strong and relatively easy to install but are prone to stretch and corrosion to a certain degree. Another option is using stainless steel rods.
Rod rigging
Rod rigging has a stretch coefficient lower than wire but is more expensive and can be intricate to install. Alternatively, synthetic rigging is becoming more popular as it weighs less than wire and rods.
Synthetic rigging
Fibers like Dyneema and other aramids are lightweight and provide ultra-high tensile strength. However, they are expensive and much more vulnerable to chafing and UV damage than other options. In my opinion, they are best suited for racing and regatta-oriented sailboats.
Wire rigging
I recommend sticking to the classic 316-graded stainless steel wire rigging for cruising sailboats. It is also the most reasonable of the options. If you find yourself in trouble far from home, you are more likely to find replacement wire than another complex rigging type.
Relevant terms on sailboat rigging and hardware
The spreaders are the fins or wings that space the shrouds away from the mast. Most sailboats have at least one set, but some also have two or three. Once a vessel has more than three pairs of spreaders, we are probably talking about a big sailing yacht.
A turnbuckle is the fitting that connects the shrouds to the toggle and chainplate on the deck. These are adjustable, allowing you to tension the rig.
A chainplate is a metal plate bolted to a strong point on the deck or side of the hull. It is usually reinforced with a backing plate underneath to withstand the tension from the shrouds.
The term mast head should be distinct from the term masthead rigging. Out of context, the mast head is the top of the mast.
A toggle is a hardware fitting to connect the turnbuckles on the shrouds and the chainplate.
How tight should the standing rigging be?
It is essential to periodically check the tension of the standing rigging and make adjustments to ensure it is appropriately set. If the rig is too loose, it allows the mast to sway excessively, making the boat perform poorly.
You also risk applying a snatch load during a tack or a gybe which can damage the rig. On the other hand, if the standing rigging is too tight, it can strain the rig and the hull and lead to structural failure.
The standing rigging should be tightened enough to prevent the mast from bending sideways under any point of sail. If you can move the mast by pulling the cap shrouds by hand, the rigging is too loose and should be tensioned. Once the cap shrouds are tightened, follow up with the intermediates and finish with the lower shrouds. It is critical to tension the rig evenly on both sides.
The next you want to do is to take the boat out for a trip. Ensure that the mast isn’t bending over to the leeward side when you are sailing. A little movement in the leeward shrouds is normal, but they shouldn’t swing around. If the mast bends to the leeward side under load, the windward shrouds need to be tightened. Check the shrouds while sailing on both starboard and port tack.
Once the mast is in a column at any point of sail, your rigging should be tight and ready for action.
If you feel uncomfortable adjusting your rig, get a professional rigger to inspect and reset it.
How often should the standing rigging be replaced on a sailboat?
I asked the rigger who produced my new rig for Ellidah about how long I could expect my new rig to last, and he replied with the following:
The standing rigging should be replaced after 10 – 15 years, depending on how hard and often the boat has sailed. If it is well maintained and the vessel has sailed conservatively, it will probably last more than 20 years. However, corrosion or cracked strands indicate that the rig or parts are due for replacement regardless of age.
If you plan on doing extended offshore sailing and don’t know the age of your rig, I recommend replacing it even if it looks fine. This can be done without removing the mast from the boat while it is still in the water.
How much does it cost to replace the standing rigging?
The cost of replacing the standing rigging will vary greatly depending on the size of your boat and the location you get the job done. For my 41 feet sloop, I did most of the installation myself and paid approximately $4700 for the entire rig replacement.
Can Dyneema be used for standing rigging?
Dyneema is a durable synthetic fiber that can be used for standing rigging. Its low weight, and high tensile strength makes it especially popular amongst racers. Many cruisers also carry Dyneema onboard as spare parts for failing rigging.
How long does dyneema standing rigging last?
Dyneema rigging can outlast wire rigging if it doesn’t chafe on anything sharp. There are reports of Dyneema rigging lasting as long as 15 years, but manufacturers like Colligo claim their PVC shrink-wrapped lines should last 8 to 10 years. You can read more here .
Final words
Congratulations! By now, you should have a much better understanding of standing rigging on a sailboat. We’ve covered its purpose and its importance for performance and safety. While many types of rigs and variations exist, the hardware and concepts are often similar. Now it’s time to put your newfound knowledge into practice and set sail!
Or, if you’re not ready just yet, I recommend heading over to my following guide to learn more about running rigging on a sailboat.
Sharing is caring!
Skipper, Electrician and ROV Pilot
Robin is the founder and owner of Sailing Ellidah and has been living on his sailboat since 2019. He is currently on a journey to sail around the world and is passionate about writing his story and helpful content to inspire others who share his interest in sailing.
Very well written. Common sense layout with just enough photos and sketches. I enjoyed reading this article.
Thank you for the kind words.
Leave a Reply Cancel reply
Your email address will not be published. Required fields are marked *
Replacing Your Standing Rigging
Published by rigworks on november 27, 2018.
Question – When should I replace my standing rigging?
From the Rigger – According to industry standards, the anticipated lifespan for stainless steel rigging is 10-12 years for wire and 15-20 years for rod. Of course, a number of factors affect a rig’s lifespan including load, sailing conditions, mileage sailed, age, fatigue from cyclic loading, environmental influences such as salinity and contamination, and frequency of care and maintenance. Many people believe that only heavily used rigging needs to be replaced, but the continuous flexing of loose wire that is not under load can take a serious toll as well. The flogging of a loose shroud can actually be harder on wire than steady pressure.
Unfortunately, there are not always visual clues that your rigging has passed its life expectancy. Things to look for include corrosion, pitting, cracks, and broken strands or “meat hooks” on the wire. Rust and discoloration can indicate the location of a crack or crystallization of the metal. Check your spreaders, chainplates and turnbuckles for cracking, fatigue, missing cotter pins/rings, etc. Check the deck around the chainplates and mast for cracking and delamination. If in doubt, get a professional opinion.
The cost to replace standing rigging obviously varies from boat to boat. Give us a call, and we can give you a rough quote. With proper measurements (wire diameter, pin sizes, wire lengths), we can give you a very accurate price for the standing rigging itself, but there are often unforeseen complications during the job (bad spreaders, corroded mast bases, hardware that is stripped on the mast, frozen pins, chainplates that are failing, etc.). A rig inspection beforehand can minimize surprises. And word of warning… jobs often get expensive because the customer decides, once the mast is down, to add furlers, masthead units, new sheets and halyards, etc. These additions add up quickly and affect the cost of parts, labor, special order shipping, taxes, etc. We are happy to accommodate your requests, but the cost of your job will escalate quickly.
Although we work closely with the boatyard during the job, you will need to negotiate yard fees (crane, mast lay days, etc.) directly with the yard of your choice. They are not included in our estimate. Driscoll Boat Works and Shelter Island Boat Yard are both within walking distance of Rigworks. Assuming it fits in our racks and we have room, we may be able to avoid mast lay day charges by storing your mast here at Rigworks.
As a quick side note… people often ask if they should switch from rod to wire rigging or vice versa during the re-rig (usually from rod to wire as rod is much more expensive per foot). Be aware that this is not a simple conversion and can be quite expensive. The terminations for wire vs. rod can be quite different and require a lot of customization.
Want to prolong the lifespan of your rigging? Here are a few suggestions…
Maintain your standing rigging! Like your car, your sailboat needs TLC. Perform routine cleaning/polishing to remove corrosives, identify chafe points and other damage, and properly tune your standing rigging (shrouds, forestay, backstay). Stainless does not like to be deprived of oxygen, so keep tape off your rigging to avoid anaerobic corrosion. For more information on rig maintenance, visit our prior ‘Ask the Rigger’ article at https://rigworks.com/maintaining-your-standing-rigging/ and download our rig-care pamphlet at https://rigworks.com/wp-content/uploads/2016/03/Standing-Rigging-Care.pdf .
Get regular rig inspections! This is a very inexpensive investment (by yachting standards ) to ensure that your rig is in sound condition. Why not schedule annual service as you would with a car? Let us go over your rig from top to bottom and end to end to identify trouble before it gets worse. For more information on rig inspections, visit our prior ‘Ask the Rigger’ article at https://rigworks.com/the-scoop-on-rig-inspections/ . Our riggers can also tune your rig, either at the dock or under sail. Not only will your rig last longer when properly tuned, your boat will sail better, and who doesn’t love that!
Consider pulling your rig every 5-6 years to inspect the mast base, chainplates, turnbuckles, wire, etc. This is considerably less expensive than a full re-rig and, again, may identify issues before they become catastrophic.
And PLEASE do not buy a used boat without a professional rig inspection! We have had many customers who have found a ‘great deal’ on a used boat only to discover that they need to spend a small fortune on new rigging. A boat with bad rigging is at best a pain in the #@$ and at worst a lethal weapon. There is nothing more expensive than a “cheap” boat!
A customer came into our shop the other day to discuss his 33-year old rigging. He said it looked fine. He asked “Isn’t the industry standard just a ploy by manufacturers to sell more wire”. Since we also stand to gain when you replace your rigging, let us say that many insurance companies will not insure sailboats with aged rigging. This should be a warning. If they are not willing to take the financial risk, are you willing to risk yourself and your crew?
Finally, should you decide to sail with that old rigging, consider checking out the ‘Ask the Rigger’ article titled “Rigs Fail… Are You Ready?” at https://rigworks.com/rigs-fail-ready/ .
Safe Sailing!

Related Posts
Ask the Rigger
Do your masthead sheaves need replacing.
Question: My halyard is binding. What’s up? From the Rigger: Most boat owners do not climb their masts regularly, but our riggers spend a lot of time up there. And they often find badly damaged Read more…
Standing Rigging (or ‘Name That Stay’)
Question: When your riggers talk about standing rigging, they often use terms I don’t recognize. Can you break it down for me? From the Rigger: Let’s play ‘Name that Stay’… Forestay (1 or HS) – Read more…
Selecting Rope – Length, Diameter, Type
Question: Do you have guidelines for selecting halyards, sheets, etc. for my sailboat? From the Rigger: First, if your old rope served its purpose but needs replacing, we recommend duplicating it as closely as possible Read more…
Standing Rigging on a Sailboat: Everything You Need to Know
by Emma Sullivan | Aug 14, 2023 | Sailboat Gear and Equipment
Short answer standing rigging on a sailboat:
Standing rigging on a sailboat refers to fixed lines and cables that support the mast and help control its movement. It includes components like shrouds, stays, and forestays. These essential elements ensure stability and proper sail trim while underway.
Understanding the Importance of Standing Rigging on a Sailboat
Sailboats are marvels of engineering and ingenuity, capable of harnessing the power of the wind to transport us across vast oceans and explore far-flung destinations. As sailors, we often focus on the majestic sails, sleek hull designs, and cutting-edge navigation technology that make these vessels so awe-inspiring. However, there is one crucial component that sometimes goes unnoticed but plays a vital role in keeping our sailboats safe and seaworthy – the standing rigging.
The standing rigging refers to the network of wires and cables that support the mast and allow it to bear the tremendous loads exerted by the sails. It acts as the backbone of a sailboat’s rig , providing stability, strength, and balance. Understanding its importance is crucial for anyone who sets foot on a vessel with dreams of cruising or competing.
Firstly, let’s examine why standing rigging is essential for sailboat safety. Imagine being out at sea when suddenly your mast collapses due to faulty rigging . This nightmare scenario can easily be avoided by regularly inspecting your boat’s standing rigging for signs of wear or fatigue. Frayed wires or corroded fittings could weaken the entire structure, making it susceptible to failure under heavy winds or rough seas . By ensuring your standing rigging is in good shape through routine maintenance and inspections by professionals, you can significantly reduce this risk and ensure your own safety onboard.
Moreover, properly tensioned standing rigging is vital for maintaining optimum sailing performance. The tension in each wire within the standing rig allows for efficient transfer of power from sails to keel through mast compression. If your standing rigging is too loose or too tight, it can negatively impact your sail trim and overall boat handling capabilities. A well-tuned rig will provide better control over sail shape adjustments necessary for different wind conditions while maximizing speed potential – something every sailor strives for!
Beyond safety and performance, understanding the importance of standing rigging requires recognizing its impact on the overall balance of your sailboat. The rigging plays a crucial role in maintaining the boat’s equilibrium by counteracting the forces exerted by the sails. Without proper tension and alignment of the standing rig, a sailboat may become unbalanced, resulting in compromised stability. This imbalance can make steering more challenging, increase the risk of broaching, or even lead to capsizing in extreme cases. Therefore, paying close attention to your standing rigging ensures that your boat remains stable and enjoyable to sail.
Lastly, it is worth mentioning that investing in high-quality materials and professional rigging services will prove cost-effective in the long run . While it may be tempting to cut corners or delay necessary upgrades or maintenance, neglecting your standing rigging will only result in more significant expenses down the line. Inadequate rig tension can lead to excessive wear on other components such as sails or mast fittings, increasing their replacement frequency and cost.
In conclusion, understanding and valuing the importance of standing rigging on a sailboat is essential for sailors of all levels. It directly impacts safety at sea, enhances sailing performance, maintains balance and stability, ultimately contributing to an enjoyable experience on board. So next time you set foot on a sailboat or contemplate owning one yourself, don’t forget to give due attention to this often overlooked but vital aspect – your boat’s standing rigging!
Step-by-Step Guide: How to Inspect and Maintain Standing Rigging on a Sailboat
Title: Cracking the Code: A Step-by-Step Guide to Inspecting and Maintaining Standing Rigging on a Sailboat
Introduction: Ahoy, fellow sailors! Whether you’re an experienced seafarer or a sailing enthusiast ready to cast off, understanding how to inspect and maintain your sailboat’s standing rigging is crucial for smooth voyages on the high seas. In this detailed guide, we will unravel the mysteries of standing rigging examination and upkeep, enabling you to confidently navigate through any sailing adventure. So hoist your mainsail, secure your halyards, and let’s dive into the world of rigging maintenance !
1. Understanding Standing Rigging: Before we embark on our inspection journey, let’s clarify what exactly constitutes standing rigging. Embracing technical jargon like professionals often do, this refers to those sturdy wire cables that provide support to the mast and keep everything in place as your vessel slices through the waves. These cables are under constant stress from wind pressure and oceanic forces; therefore, routine inspections are vital.
2. Assemble Your Inspection Arsenal: Essential tools at hand? Check! Embark upon your quest equipped with binoculars (to assess hard-to-reach areas), a multimeter (for electrical testing), tape measure (we love accuracy!), a notepad (to document findings), lubricant spray can (to combat rust), and some good ol’ elbow grease.
3. Visual Inspection Bonanza: Begin by examining every component of your standing rigging thoroughly. Start from bow to stern – nothing should elude your gaze! Look out for signs of fraying wires, corrosion spots – identified by those elusive green spots -, improperly tightened connections or turnbuckles hanging loose like unfortunate pirate hooks. Pay close attention when checking shrouds and stays around their terminal points.
4. Tension Testing Zen: Employing a multimeter capable of measuring tension is vital for this next step. Like tuning an instrument, each cable must be correctly tensioned to ensure optimal performance . Begin at the base of your mast, working your way up one stay or shroud after another, carefully noting the readings. Adjust tensions as needed, using the manufacturer’s guidelines as your North Star.
5. Get Into Detailing Mode: To maintain a seaworthy craft, meticulousness is key! Start by cleaning every inch of standing rigging with fresh water and mild soap to rid it of salt crystals and other corrosive agents that Mother Nature throws our way. Once dry, inspect terminals for any hidden corrosion potential. Remember to apply lubrication around all fittings where metal meets metal – preserving their longevity on this salty adventure.
6. Diving into DIY Replacements: Sometimes, despite our best efforts, some elements may need replacement eventually. Worn-out or damaged fittings demand immediate action! While there are professionals who can lend a helping hand, attempting minor repairs yourself allows you to save time and money in the long run. Just remember safety first – secure your vessel properly before venturing aloft!
7. Periodic Inspections are Pathway to Peace: As the seasons go by and maritime miles accumulate beneath your hull’s keel, remember that rigging inspections should become regular occurrences in your life as a sailor. Incorporating these tasks into your annual maintenance routine will keep you up-to-date on the health of your standing rigging and reduce unexpected surprises during those thrilling offshore adventures.
Conclusion: With this comprehensive guide in tow, inspecting and maintaining standing rigging on a sailboat will no longer bewilder even the most landlocked soul. Armed with knowledge and armed-still-with tools-of-the-trade in hand – embark upon every voyage knowing that smooth sailing is within reach! Remember comrades: vigilance coupled with clever maintenance ensures many marvelous voyages atop Neptune’s watery kingdom!
The Key Components of Standing Rigging on a Sailboat Explained
When it comes to sailing, understanding the key components of standing rigging is crucial. This system of cables and wires plays a vital role in keeping a sailboat’s mast upright and ensuring the safety of everyone on board. So, let’s dive into these essential elements to unravel their importance and how they work together seamlessly.
1. Mast: The mast, often referred to as the backbone of a sailboat, is a tall vertical structure that supports the sails. It provides stability and acts as an attachment point for various components of the standing rigging.
2. Shrouds: Shrouds are strong steel or synthetic cables that extend from the top of the mast down to its sides, creating lateral support. Usually arranged in pairs, they help prevent excessive side-to-side movement and maintain proper alignment while under sail or at anchor .
3. Forestay: Situated at the front of the mast, directly opposite to where you stand while steering, is the forestay. This forward-facing cable keeps the mast from tipping backward due to wind pressure against the sails when sailing upwind. It ensures that your sailboat remains balanced even in gusty conditions.
4. Backstay: The backstay is another essential component that counterbalances the force exerted by the forestay on your sailboat’s mast when sailing upwind or under heavy loads. Most commonly attached at or near the highest part of your boat ‘s stern (aft end), this cable prevents undue bending or breaking caused by fore-aft pressure.
5. Tangs and Turnbuckles: These small yet mighty components connect shrouds and stays to both the hull and mast with ease and allow for easy adjustment and fine-tuning of tensioning within your standing rigging system. Tangs are fittings attached directly to masts or other structural components using bolts or screws, while turnbuckles provide threaded connections allowing for precise adjustments.
6. Spreaders: Installed horizontally on either side of the mast, spreaders play a crucial role in maintaining the integrity and proper angle of shrouds. They prevent excessive bending or twisting forces by creating a wider stance for the shrouds, ensuring even stress distribution.
7. Standing Rigging Lifelines: These lines, typically made of stainless steel wires or synthetic materials like Dyneema, serve as an additional safety measure by helping to prevent crew members from falling overboard while working on deck. Strategically placed along the sides of the sailboat, they offer stability and support during maneuvering or rough seas.
Understanding these key components is vital not only for sailboat owners but also for anyone interested in sailing . Proper maintenance and routine inspections are essential to ensure optimal performance and mitigate any risks associated with deficiencies within your standing rigging system.
So next time you set sail or find yourself gazing out at a beautifully rigged sailboat, take a moment to appreciate the intricate balance and coordination that these key components provide. It’s truly a remarkable collaboration between technology, engineering, and Mother Nature herself – allowing us to glide through the waves with grace and elegance.
Common FAQs about Standing Rigging on a Sailboats Answered
Introduction: Standing rigging is an essential component of sailboats, playing a crucial role in supporting the mast and ensuring optimal performance on the water. However, many sailors are often perplexed by various aspects of standing rigging, leading to a multitude of frequently asked questions. In this comprehensive blog post, we aim to answer some of the most common FAQs about standing rigging on sailboats, providing detailed and professional insights while adding a touch of wit and cleverness.
1. What exactly is standing rigging? Ah, standing rigging – the unsung hero of every sailboat! Standing rigging refers to all the fixed elements that support the mast in an upright position. These elements typically comprise stainless steel wires called shrouds and stays along with associated fittings like turnbuckles and tangs. Think of it as the sturdy backbone that keeps your mast from taking an inconvenient swim!
2. When should I inspect my standing rigging? Regular inspections are crucial for maintaining a safe sailing experience. We recommend inspecting your standing rigging at least once a year or before embarking on any long voyage. Additionally, keep an eye out for any signs indicating potential problems such as excessive rust, wire deformation, or frayed cables. Remember: It’s better to be safe on land than sorry at sea !
3. How do I know when it’s time to replace my standing rigging? While rigorous inspections can highlight any potential issues, there are certain indicators that suggest your standing rigging might need replacement sooner than later:
a) Age: As a general rule of thumb, consider replacing your standing rigging after 10-15 years. b) Visible damage: If you spot visible signs of wear and tear like broken strands or corroded fittings, it’s time for new gear. c) Elongation: In some cases, constant strain can cause wire elongation over time – if this exceeds manufacturer recommendations or 5%, it’s replacement time. d) Performance decline: Have you noticed reduced boat performance or excessive mast movement? Outdated rigging may be the culprit.
4. Can I inspect and replace standing rigging myself? Inspecting your own standing rigging is indeed possible if you possess adequate knowledge and experience. However, replacing it yourself requires specific expertise, so unless you’re a seasoned sailor with professional background in rigging, we highly recommend entrusting this task to certified riggers who can ensure everything is done correctly. After all, your safety should never be compromised!
5. How much does standing rigging replacement cost? Ah, the golden question! While costs can vary depending on factors like the size of your boat, the material used for new rigging (stainless steel or synthetic fibers), and labor expenses – expect to invest anywhere from a few thousand to tens of thousands of dollars for a complete standing rigging replacement. Remember that proper maintenance upfront can help extend the lifespan of your rigging and save you some precious doubloons!
6. Can I switch from stainless steel to synthetic fibers for my standing rigging? Absolutely! Synthetic fiber alternatives like Dyneema® have gained popularity due to their lighter weight, high strength-to-weight ratio, and lower corrosion risk compared to stainless steel. These materials offer enhanced performance capabilities and are a valid consideration when upgrading or replacing your standing rigging system entirely.
7. What’s the typical lifespan of synthetic fiber standing rigging? While longevity depends on various factors such as usage patterns and environmental conditions, well-maintained synthetic fiber standing rigging systems generally last around 10-12 years before requiring replacement – comparable to their stainless steel counterparts.
Conclusion: Standing rigging on sailboats may seem mysterious at first glance, but by answering these common FAQs with informative yet witty explanations, we hope to shed light on this crucial sailing component while bringing a smile to our readers’ faces. Remember, understanding and properly maintaining your standing rigging will ensure safe and enjoyable voyages for years to come. So, stay rig-ready and sail on!
Upgrading Your Standing Rigging: What You Need to Know
In the world of sailing, upgrading your standing rigging is a vital decision that can greatly impact your vessel’s performance and overall safety. The standing rigging, which includes the various wires and cables that hold the mast upright, plays an essential role in ensuring stability and proper sail control. In this blog post, we will delve into everything you need to know about this crucial aspect of sailing.
Firstly, why should you consider upgrading your standing rigging? Over time, wear and tear can take a toll on this crucial component of your boat . Exposure to harsh weather conditions, continuous strain from strong winds or heavy sails, and even galvanic corrosion can all lead to the degradation of your rigging. As a responsible sailor, it is imperative to regularly assess the condition of your standing rigging and determine when an upgrade is necessary.
When it comes to upgrading your standing rigging, there are several key factors you need to consider. One essential aspect is choosing the right materials for your new rigging. Traditionally, stainless steel has been widely used due to its durability and strength. However, recent advancements in composite materials have opened up new possibilities for sailors. High-tech fibers like carbon or aramid offer impressive strength-to-weight ratios while being less susceptible to corrosion than steel.
It is important to consult with an experienced rigger or marine engineer who can guide you in selecting the most suitable material for your specific sailing activities and vessel type. They will take into account factors such as boat size, intended use (racing or cruising), budget constraints, and local climate conditions before recommending the best material for your standing rigging upgrade.
Another crucial consideration in upgrading your standing rigging is determining whether you want to switch from wire rope-based rigging to rod-based systems or composite products. Rods are known for their superior stiffness and excellent fatigue resistance but may require specialized equipment for assembly and maintenance. Composite systems typically combine carbon fiber or fiberglass with a resin matrix, offering versatility and customization options.
Furthermore, when planning to upgrade your standing rigging, it’s essential to conduct a thorough inspection of the mast and fittings. Any signs of wear and tear, cracks, or deformations in the mast or associated hardware should not be overlooked. Reinforcing these components may be necessary before installing new rigging to ensure optimal safety and performance .
During the installation process itself, meticulous attention to detail is crucial. Proper tensioning and alignment of the rigging are vital for achieving optimal sailing performance . Consulting with professionals in the field will ensure that you avoid common pitfalls such as over-tensioning or under-tensioning your rigging, which can potentially compromise its strength and longevity.
Upgrading your standing rigging not only ensures a safer sailing experience but also presents an opportunity to enhance your vessel’s performance capabilities. By optimizing sail control and reducing overall weight aloft, you can achieve faster speeds and improved maneuverability on the water.
In conclusion, upgrading your standing rigging is an investment that should never be taken lightly. It requires careful consideration of multiple factors such as materials, boat specifications, and local conditions. Seeking expert advice throughout this process will help you make informed decisions that align with your sailing goals while ensuring maximum safety and enjoyment on the open seas . So don’t hesitate – take charge of your vessel’s integrity today by embarking on an exhilarating upgrade journey!
Troubleshooting Common Issues with Standing Rigging on a Sailboat
Title: Navigating the High Seas of Standing Rigging: Deconstructing Common Sailboat Troubles
Introduction: Setting sail on a beautiful day, wind in your hair, and salt in the air – there’s nothing quite like the freedom of sailing. But as any experienced sailor knows, with great freedom comes great responsibility; one must always be prepared to tackle common issues that can arise with standing rigging on a sailboat. In this comprehensive guide, we’ll be your navigational chart through the murky waters of troubleshooting these problems.
1. The Tale of Loose Wires: Picture this: you’re out at sea, enjoying the blissful embrace of nature when suddenly you notice an unsettling amount of slack in your boat’s rigging wires. As panic sets in, take a deep breath and remember that loose wires are not an uncommon predicament. Before jumping ship into despair, consider inspecting your turnbuckles for any signs of wear or corrosion. Often, a simple tightening or lubing can solve the issue and restore equilibrium to your rigging system.
2. Strange Groans from Your Mast: As the wind howls through your sails, does it feel like someone is playing an eerie tune on your mast? Fear not! These disconcerting noises can typically be traced back to halyards rubbing against sheaves or pulleys. Be diligent about inspecting these components and ensuring they are properly aligned and lubricated.
3. The Mystery of Shaky Connections: Imagine cruising along peacefully when you notice unsettling vibrations emanating from various connections within your standing rigging system – another nuisance faced by many sailors. Remember to check bolts and fittings for tightness and wear regularly; sometimes a mere tightening can spare you from enduring an inconvenient wobble during every voyage.
4. Elusive Corrosion Castaways: While corrosion may seem like a mythical creature lurking under layers of saltwater incantations, it sadly isn’t. The corrosive effects of the marine environment can take their toll on your rigging, leading to weakened and compromised wires. To avoid this encroaching villain, regularly inspect your rigging for signs of corrosion, paying extra attention to any dissimilar metals in contact with each other. When identified early, you can tackle this issue head-on through diligent cleaning and application of protective coatings.
5. That Perplexing Sag: No one wants a saggy rig! If you notice an unacceptable amount of slack or downward curve in your wire stays or shrouds when under load, it’s time to put on your problem-solving hat. Begin by ensuring that all turnbuckles are suitably tensioned and that the mast rake is properly adjusted. A little fine-tuning may be all it takes to regain the tautness required for smooth sailing .
6. Stay Seals Against Abrasion: Do you find your stay seals battling against wear and tear? It might be time to beef up their defenses! Insulate vulnerable areas with appropriately sized rubber tubing or durable tape like self-amalgamating tape. This extra layer of protection will help prevent damage from chafing lines or abrasive surfaces.
Conclusion: As sailboat enthusiasts know, standing rigging issues can arise unexpectedly and interrupt even the most idyllic voyages at sea. By keeping these troubleshooting considerations in mind while setting sail , you’ll have a handy compass to lead you through the challenges that come with maintaining a well-maintained rig. So next time the wind whispers trouble into your ears while adrift on your beautiful vessel, fear not – armed with knowledge and wit, you’ll conquer those common issues with ease and go back to enjoying the sublime freedom provided by sailing adventures!
Recent Posts

- Sailboat Gear and Equipment
- Sailboat Lifestyle
- Sailboat Maintenance
- Sailboat Racing
- Sailboat Tips and Tricks
- Sailboat Types
- Sailing Adventures
- Sailing Destinations
- Sailing Safety
- Sailing Techniques
Currency: GBP
- Worldwide Delivery
Mooring Warps and Mooring Lines
- LIROS 3 Strand Polyester Mooring Warps
- LIROS Green Wave 3 Strand Mooring Warps
- LIROS Braided Dockline Mooring Warps
- LIROS Handy Elastic Mooring Warps
- Marlow Blue Ocean Dockline
- LIROS Super Yacht Mooring Polyester Docklines
- 50 metre / 100 metre Rates - Mooring
Mooring Accessories
- Mooring Compensators
Mooring Strops and Bridles
- V shape Mooring Bridles
- Y shape Mooring Bridles
- Small Boat and RIB Mooring Strops
- Mooring Strops
- Mooring Strops with Chain Centre Section
Mooring Assistance
- Coastline Bow Thruster Accessories
- Max Power Bow Thrusters
- Bonomi Mooring Cleats
- Majoni Fenders
- Polyform Norway Fenders
- Ocean Inflatable Fenders
- Dock Fenders
- Fender Ropes and Accessories
Mooring Components
- Mooring Swivels
- Mooring Shackles
- Mooring Cleats and Fairleads
- Mooring Buoys
Mooring Information
- Mooring Warps Size Guide
- Mooring Lines - LIROS Recommended Diameters
- Mooring Rope Selection Guide
- Mooring Warp Length and Configuration Guide
- How to estimate the length of a single line Mooring Strop
- Mooring Ropes - Break Load Chart
- Mooring Compensator Advisory
- Rope Cockling Information
- Fender Size Guide
- Majoni Fender Guide
- Polyform Norway Fender Inflation Guide
- More Article and Guides >
Anchor Warps Spliced to Chain
- LIROS 3 Strand Nylon Spliced to Chain
- LIROS Anchorplait Nylon Spliced to Chain
Anchor Warps
- LIROS Anchorplait Nylon Anchor Warps
- LIROS 3 Strand Nylon Anchor Warps
- Leaded Anchor Warp
- Drogue Warps and Bridles
- 50 / 100 metre Rates - Anchoring
- Aluminium Anchors
- Galvanised Anchors
- Stainless Steel Anchors
Calibrated Anchor Chain
- Cromox G6 Stainless Steel Chain
- G4 Calibrated Stainless Steel Anchor Chain
- Lofrans Grade 40
- MF DAMS Grade 70
- MF Grade 40
- Titan Grade 43
- Lewmar Windlasses
- Lofrans Windlasses
- Maxwell Windlasses
- Quick Windlasses
- Windlass Accessories and Spares
Chain Snubbers
- Chain Hooks, Grabs and Grippers
- Chain Snubbing Bridles
- Chain Snubbing Strops
Anchoring Accessories
- Anchor Connectors
- Anchor Trip Hooks and Rings
- Anchoring Shackles
- Bow Rollers and Fittings
- Chain and Anchor Stoppers
- Chain Links and Markers
Anchoring Information
- How To Choose A Main Anchor
- Anchoring System Assessment
- Anchor Chain and Rope Size Guide
- The Jimmy Green Guide to the Best Anchor Ropes
- What Size Anchor Do I Need?
- Anchor to Chain Connection Guide
- How to Choose Your Anchor Chain
- How to Establish the Correct Anchor Chain Calibration?
- Calibrated Anchor Chain - General Information
- Calibrated Anchor Chain Quality Control
- Calibrated Chain - Break Load and Weight Guide
- Galvanising - Managing Performance and Endurance expectation
- Can Galvanised Steel be used with Stainless Steel?
- Windlass Selection Guide
- More Articles and Guides
Stainless Steel Wire Rigging and Wire Rope
- 1x19 Wire Rigging
- 50 / 100 metre Rates - Wire and Fibre
- 7x19 Flexible Wire Rigging
- Compacted Strand Wire Rigging
Dinghy Rigging
- Stainless Steel Dinghy Rigging
- Dinghy Rigging Fittings
Fibre Rigging
- LIROS D-Pro Static Rigging
- LIROS D-Pro-XTR Fibre Rigging
- DynIce Dux Fibre Rigging
- Fibre Rigging Fittings
Wire Terminals
- Cones, Formers, Wedges, Ferrules, Rigging Spares
- Hi-Mod Swageless Terminals
- Sta-Lok Swageless Terminals
- Swage Terminals
Wire Rigging Fittings
- Turnbuckle Components
Rigging Accessories
- Rigging Chafe Protection
- Headsail Reefing Furlers
- Plastimo Jib Reefing
- Selden Furlex Reefing Gear
Furling Systems
- Anti-torsion Stays
- Straight Luff Furlers
- Top Down Furlers
Guard Wires, Rails and Fittings
- Guard Rail Fittings
- Guard Rails in Fibre and Webbing
- Guard Wire Accessories
- Guard Wires
Standing Rigging Assistance
- Replacing your Furling Line
- Fibre Rigging Break Load Comparison Guide
- More Articles and Guides >
- Cruising Halyards
- Performance Halyards
- Dinghy Halyards
Rigging Shackles
- Captive and Key Pin Shackles
- hamma™ Snap Shackles
- Soft Shackles
- Standard Snap Shackles
- Wichard Snap Shackles
Classic Ropes
- Classic Control Lines
- Classic Halyards
- Classic Sheets
- Cruising Sheets
- Performance Sheets
- Dinghy Sheets
Sail Handling
- Boom Brakes and Preventers
- Lazy Jack Sail Handling
- Rodkickers, Boomstruts
- Sail Handling Accessories
50 / 100 metre Rates - Running Rigging
- 50 / 100 metres - Cruising Ropes
- 50 / 100 metres - Dinghy Ropes
- 50 / 100 metres - Performance Ropes
Control Lines
- Cruising Control Lines
- Performance Control Lines
- Dinghy Control Lines
- Continuous Control Lines
Running Rigging Accessories
- Anti-Chafe Rope Protection
- Lashing, Lacing and Lanyards
- Mast and Boom Fittings
- Rope Stowage
- Sail Ties and Sail Stowage
- Shock Cord and Fittings
- LIROS Ropes
- Marlow Ropes
Running Rigging Resources
- Running Rigging Rope Fibres and Construction Explained
- How to Select a Suitable Halyard Rope
- How to select Sheets and Guys
- Dyneema Rope - Cruising and Racing Comparison
- Dinghy Rope Selection Guide
- Rope Measurement Information
- Running Rigging - LIROS Recommended Line Diameters
- Running Rigging Break Load Comparison Chart
- Colour Coding for Running Rigging
- Selecting the right type of block, plain, roller or ball bearing
- Recycling Rope
- Running Rigging Glossary
Plain Bearing Blocks
- Barton Blocks
- Harken Element Blocks
- Low Friction Rings
- Selden Yacht Blocks
- Wichard MXEvo Blocks
- Wooden Yacht Blocks
Control Systems
- Ratchet Blocks
- Stanchion Blocks and Fairleads
- Snatch Blocks
- Genoa Car Systems
- Traveller Systems
- Block and Tackle Purchase Systems
Ball Bearing Blocks
- Harken Ball Bearing Blocks
- Selden Ball Bearing Blocks
Roller Bearing Blocks
- Harken Black Magic Blocks
- Selden Roller Bearing Blocks
Deck Fittings
- Bungs and Hatches
- Bushes and Fairleads
- Deck Eyes, Straps and Hooks
- Pad Eyes, U Bolts and Eye Bolts
- Pintles and Gudgeons
- Tiller Extensions and Joints
- Harken Winches, Handles and Accessories
- Barton Winches, Snubbers and Winchers
- Lewmar Winches, Handles and Accessories
- Winch Servicing and Accessories
Clutches and Organisers
- Barton Clutches and Organisers
- Spinlock Clutches and Organisers
- Lewmar Clutches
- Harken Ball Bearing Cam Cleats
- Barton K Cam Cleats
Deck Hardware Support
- Blocks and Pulleys Selection Guide
- Barton High Load Eyes
- Dyneema Low Friction Rings Comparison
- Seldén Block Selection Guide
- Barton Track Selection Guide
- Barton Traveller Systems Selection Guide
- Harken Winch Selection Guide
- Karver Winch Comparison Chart
- Lewmar Winch Selection Guide - PDF
- Winch Servicing Guide
Sailing Flags
- Courtesy Flags
- Red Ensigns
- Blue Ensigns
- Signal Code Flags
- Flag Staffs and Sockets
- Flag Accessories
- Flag Making and Repair
- Webbing only
- Webbing Soft Shackles
- Webbing Restraint Straps
- Webbing Sail Ties
- Sail Sewing
- PROtect Tape
Fixings and Fastenings
- Screws, Bolts, Nuts and Washers
- Monel Rivets
Hatches and Portlights
- Lewmar Hatches
- Lewmar Portlights
- Fids and Tools
- Knives and Scissors
General Chandlery
- Carabiners and Hooks
- Antifouling
Flag Articles
- Flag Size Guide
- Bending and Hoisting Methods for Sailing Flags
- Courtesy Flags Identification, Labelling and Stowage
- Courtesy Flag Map
- Flag Etiquette and Information
- Glossary of Flag Terms and Parts of a Flag
- Making and Repairing Flags
- Signal Code Message Definitions
Other Chandlery Articles
- Anchorplait Splicing Instructions
- Antifoul Coverage Information
- Hawk Wind Indicator Selection Guide
- Petersen Stainless - Upset Forging Information
- Speedy Stitcher Sewing Instructions
- Thimble Dimensions and Compatible Shackles
Jackstays and Jacklines
- Webbing Jackstays
- Stainless Steel Wire Jackstay Lifelines
- Fibre Jackstay Lifelines
- Jackstay and Lifeline Accessories
Lifejackets
- Crewsaver Lifejackets
- Seago Lifejackets
- Spinlock Lifejackets
- Children's Life Jackets
- Buoyancy Aids
Floating Rope
- LIROS Multifilament Polypropylene
- LIROS Yellow Floating Safety Rope
Guard Wires, Guardrails and Guardrail Webbing
Lifejacket accessories.
- Lifejacket Lights
- Lifejacket Rearming Kits
- Lifejacket Spray Hoods
- Safety Lines
Seago Liferafts
- Grab Bag Contents
- Grab Bags and Polybottles
- Liferaft Accessories
- Danbuoy Accessories
- Jimmy Green Danbuoys
- Jonbuoy Danbuoys
- Seago Danbuoys
Overboard Recovery
- Lifebuoy Accessories
- Purchase Systems
- Slings and Throwlines
Safety Accessories
- Fire Safety
- Sea Anchors and Drogues
Safety Resources
- Guard Wires - Inspection and Replacement Guidance
- Guard Wire Stud Terminal Dimensions
- Webbing Jackstays Guidance
- Webbing Jackstays - Custom Build Instructions
- Danbuoy Selection Guide
- Danbuoy Instructions - 3 piece Telescopic - Offshore
- Liferaft Selection Guide
- Liferaft Servicing
- Man Overboard Equipment - World Sailing Compliance
- Marine Safety Information Links
- Safety Marine Equipment List for UK Pleasure Vessels
Sailing Clothing
- Sailing Jackets
- Sailing Trousers
- Thermal Layers
Leisure Wear
- Accessories
- Rain Jackets
- Sweatshirts
Sailing Footwear
- Dinghy Boots and Shoes
- Sailing Wellies
Leisure Footwear
- Walking Shoes
Sailing Accessories
- Sailing Bags and Holdalls
- Sailing Gloves
- Sailing Kneepads
Clothing Clearance
Clothing guide.
- What to wear Sailing
- Helly Hansen Mens Jacket and Pant Size Guide
- Helly Hansen Womens Sailing Jacket and Pant Size Guide
- Lazy Jacks Mens and Womens Size Charts
- Musto Men's and Women's Size Charts
- Old Guys Rule Size Guide
- Sailing Gloves Size Guides
- Weird Fish Clothing Size Charts
The Jimmy Green Clothing Store
Lower Fore St, Beer, East Devon, EX12 3EG
- Adria Bandiere
- Anchor Marine
- Anchor Right
- August Race
- Barton Marine
- Blue Performance
- Brierley Lifting
- Brook International
- Brookes & Adams
- Captain Currey
- Chaineries Limousines
- Coastline Technology
- Colligo Marine
- Cyclops Marine
- Douglas Marine
- Ecoworks Marine
- Exposure OLAS
- Fire Safety Stick
- Fortress Marine Anchors
- Hawk Marine Products
- Helly Hansen
- International
- Jimmy Green Marine
- Maillon Rapide
- Mantus Marine
- Marling Leek
- Meridian Zero
- MF Catenificio
- Ocean Fenders
- Ocean Safety
- Old Guys Rule
- Petersen Stainless
- Polyform Norway
- PSP Marine Tape
- Sidermarine
- Stewart Manufacturing Inc
- Team McLube
- Technical Marine Supplies
- Titan Marine (CMP)
- Ultramarine
- Waterline Design
- William Hackett
Clearance LIROS Racer Dyneema £55.08
Clearance Folding Stock Anchor £123.25
Clearance Sarca Excel Anchors £294.00
Clearance LIROS Herkules £0.00
Clearance Barton Size 0 Ball Bearing Blocks - 5mm £0.00
Clearance Marlow Blue Ocean® Doublebraid £18.48
Mooring Clearance
Anchoring clearance, standing rigging clearance, running rigging clearance, deck hardware clearance, chandlery clearance, safety clearance, replacing your standing rigging - a step by step guide.
Replacing the standing rigging on a sailing yacht, a complete re-rig, in other words, may seem daunting. Still, there is a procedure to follow that can make it a relatively straightforward process for anyone who is reasonably practical.
The first decision is whether to tackle the job with the mast up or down
If you have enough time, together with the availability of a mast lift, then mast down is by far the easier option. The whole project will be more straightforward with the mast horizontal, chocked up on firm ground and accessible for inspection and work. You may even choose to do the upper mast inspection after lowering the mast to save going aloft in a bosun's chair. You can purchase each wire with swaged terminals, finished and ready to fit at both ends. You can order yourself online or with help from the Jimmy Green Rigging Team.

You can take confidence from the fact that there is a good deal of adjustment on the rigging screws to allow for minor measurement errors. It is worth noting that Team Jimmy Green set the turnbuckles at 2/3 open unless otherwise requested and undertake to produce the finished wires accurately to within plus or minus the diameter of the wire.
If the mast has to remain stepped, you need a slightly different approach, generally involving the purchase of each wire over-long with the top terminal swaged. The bottom end will need to be finished in situ by cutting to the exact length and fitting a DIY self-fit swageless (mechanical) terminal. Modern swageless terminals from Sta-Lok, Bluewave or Petersen are reasonably simple to fit so that you can be confident of success.
If you can take down each stay individually and temporarily to measure it accurately, you can order the replacements with swaged fittings at both ends. Each wire should be pulled out taut with some tension to ensure an accurate measurement. It won't be easy to measure a stay accurately while it is still in situ.
Please note that the information in yacht manuals should not be regarded as reliably accurate enough to make up a set of finished rigging.

Rigging Checklist
Rig tune and tension check on existing rigging.
- Consider any design or specification alterations
- Close inspection of all components, including measuring diameters
Take photos
Mark all tension settings, determine any possible improvements.
- Order process for mast unstepped
- Order process for mast remaining stepped
Each step is explained more fully below:
Begin by checking that your current rigging is set up and tuned correctly. This need not be as technical as it sounds - you need to be sure that you will copy a rig that works well. The essentials are mast rake and bend, athwartship vertical alignment and correct tensioning. You may want to ask for some professional advice. Still, if your current setup performs satisfactorily upwind and downwind on both tacks/gybes, it may be best to avoid interfering with the current settings. The aim of the game is to replicate the old rig with a new one within parameters that allow for adjustment and tuning.

Look for extra unnecessary shackles or toggles which may have been added to compensate for the wire being too short, and determine whether they can be omitted from the new rig.
Consider any design or specification alterations.
The next step is to survey all aspects of the rigging, including an assessment of whether the existing is the right design and specification for your anticipated purposes, e.g. Coastal, Offshore or Ocean Cruising, occasional or hard core racing.
Close inspection of all components
Carry out a thorough rigging inspection, including all the wire, terminals and clevis pins. Establish the size of every component and make notes. A good quality pair of callipers is an invaluable investment for producing accurate results.
Once you have confirmed the wire diameter, the approximate length and identified the terminals, top and bottom, it is a simple online exercise to get an accurate estimate of the replacement cost on Standing Rigging . Alternatively, Team Jimmy Green can produce a costing based on the same information.
Take photos of everything, including zoomed-in details of anything you are unsure about and any others that will serve as a reminder when fitting the new shrouds and stays.
Check for any signs of wear or structural damage and identify the probable cause.
Problems can occur for many reasons:
- Misalignment leading to stress at an odd angle
- T terminals that are not seated properly in their mast plate
- T terminals that don't quite match their mast plate
- Fittings that allow unnecessary movement
- Lack of articulation due to missing toggles
- Undersized clevis pins or oversized clevis pin holes
Some of these may be the reason you are replacing the rig, so avoid repeating the issue on the new setup.

Standard pin and hole diameters correspond with the thread size of the studs in the turnbuckles. Each wire diameter has a varied choice of stud/turnbuckle sizes. Components on either side of the standard sizing are denoted as Down Size and Up Size by Petersen Stainless Rigging. Threads are generally UNF or possibly the Metric equivalent. The table below sets out all the relevant sizes for standard, Down Size and Up Size components. If your rigging has unique non-standard characteristics, the Jimmy Green Rigging Team can source bespoke replacements or suggest suitable alternatives.
This chart is a guide only. Please check all dimensions before ordering your rigging.
| Wire Diameter | Pattern | Tread UNF | Petersen Turnbuckle | Turnbuckle Toggle Pin Diameter | Petersen Eye Terminal | Eye Inside Diameter | Petersen Fork Terminal | Pin Diameter |
|---|---|---|---|---|---|---|---|---|
| 3mm | Standard only | 1/4" | GTST03 | 6mm | FSE03 | 6.35mm | SF03 | 6mm |
| 4mm | Down Size | 1/4" | GTST04DS | 6mm | ~ | ~ | ~ | 6mm |
| 4mm | Standard | 5/16" | GTST04 | 8mm | FSE04 | 8.0mm | SF04 | 8mm |
| 4mm | Up Size | 3/8" | GTST04US | 9.5mm | ~ | ~ | ~ | 9.5mm |
| 5mm | Down Size | 5/16" | GTST05DS | 8mm | ~ | ~ | ~ | ~ |
| 5mm | Standard | 3/8" | GTST05 | 9.5mm | FSE05 | 9.53mm | SF05 | 9.5mm |
| 5mm | Up Size | 7/16" | GTST05US | 11mm | ~ | ~ | ~ | ~ |
| 6mm | Down Size | 3/8" | GTST06DS | 9.5mm | FSE06 | 11.1mm | SF06 | 11mm |
| 6mm | Standard | 7/16" | GTST06 | 11mm | FSE06 | 11.1mm | SF06 | 11mm |
| 6mm | Up Size | 1/2" | GTST06US | 12.7mm | ~ | ~ | ~ | ~ |
| 7mm | Standard Only | 1/2" | GTST07 | 12.7mm | FSE07 | 12.7mm | SF07 | 12mm |
| 8mm | Down Size | 1/2" | GTST08DS | 12.7mm | FSEE08DS | 14.28mm | SF08DS | 12mm |
| 8mm | Standard | ~ | ~ | ~ | FSE08 | 14.28mm | SF08DS | 14mm |
| 8mm | Up Size | 5/8" | GTST08US | 16mm | FSE8US | 16.0mm | ~ | ~ |
| 10mm | Standard | 5/8" | GTST10 | 16mm | FSE10 | 16.0mm | SF10 | 16mm |
| 10mm | Up Size | 3/4" | GTST10US | 19mm | ~ | ~ | ~ | ~ |
| 12mm | Standard | 3/4" | GTST12 | 19mm | FSE12 | 19.05mm | SF12 | 19mm |
Please note all the turnbuckle settings before disconnecting any shrouds or stays by marking them with tape or taking photos. It would be best if you loosened all the turnbuckles to disconnect them at deck level.
Remember to return them to their noted settings before measuring. The new rigging can be made to the required length with the optimum adjustment, normally 2/3 open.

One last check to ensure that there isn’t a change of fitting or a tweak in the setup that will make the new rig an improvement on the old one.
Order Process for Mast-Unstepped.
Dependent on the time factor, there are two main options to consider:
Determine the terminals required, measure the wires, make any adjustments, place your order online, or email your requirements for Team Jimmy Green to load the order for you.
N.B. The old wires should be removed from the mast and pulled out taut with a degree of tension to ensure they are straight in readiness for measuring.
Measurements are from bearing edge to bearing edge of the pins or eyes.
Please refer to our Standing Rigging Custom Build Instructions for T terminals and studs.
Label the individual stays. You may need them as an aide memoir when you come to fit the new standing rigging.
Check and double-check your measurements and terminal fittings before ordering. Remember the old adage: “Measure twice, cut once”.
Remove the old stays, labelling them carefully and noting any amendments required to length or fittings.
Coil the wires as neatly as possible.
Send them or bring them to Jimmy Green Marine for assessment and a quote.
This option puts the onus on the Jimmy Green Rigging Team to replicate your rigging accurately.
Order Process for mast remaining stepped.
Establish the length of the existing shrouds and stays.
Please look at our Standing Rigging Custom Build Instructions
Order new wires with the required top terminals swaged on and the wire length appropriately over length for cutting and fitting in situ.
Order DIY swageless terminals for the bottom end.
The wire should be long enough to be cut and fitted with the new swageless terminal to finish at the desired length.
N.B. Replacing the forestay will be tricky if it is fitted with a headsail furler, and you may need professional help.
Take down each shroud individually. N.B. take precautions to stay the mast with a temporary line.
Measure the length accurately and replace it on the mast.
Repeat the process for each shroud or stay.
Measurements are from BEARING EDGE TO BEARING EDGE of the pins or eyes.
For T terminals and studs, refer to our STANDING RIGGING CUSTOM BUILD INSTRUCTIONS .
Jimmy Green Advisory - Check your Order Details Carefully
You must check your order confirmation for any discrepancies, especially for complex orders.
Please pay special attention to orders uploaded to our website for you, e.g. those originating from telephone or email enquiries or Team Jimmy Green pattern measurement.
This will highlight any misunderstanding before the work is commenced.
There is a wealth of information available to help you to a successful conclusion on our website:
Standing Rigging Assistance Shop for Standing Rigging
Give feedback on this article

The $tingy Sailor
Diy trailerable sailboat restoration and improvement without throwing your budget overboard.

How to Replace Your Standing Rigging for Less
When we purchased Summer Dance , the standing rigging was one system that I knew I would need to replace right away. The upper shrouds had been replaced recently with well made cables, probably from that popular online Catalina parts retailer. The backstay and forestay were in satisfactory condition but were original from 1981. The lower shrouds were a mix of mismatched, poor quality, oversized replacements and failing originals.
At first, I assumed that I would replace the backstay, forestay, and lower shrouds with kits from that same retailer. They make replacement easy with pre-made kits or they can make custom replacements from your original rigging. But their prices are steep and I’d had a bad experience with their technical support so I decided to look for other options.
Shopping around
I tried to get price quotes to compare with the Catalina parts retailer from several other rigging shops that advertise in sailing magazines and online but they were either unresponsive or vague. Next, I considered making the rigging myself from materials bought online. But investing in the proper tools would dilute the cost savings considerably. I would have to replace the rigging multiple times to recoup that investment.
Then I remembered that there is an industrial rigging company located near me. I was familiar with their regular steel wire rope products from a job that I held long ago that used their products. I called them to find out if they worked with stainless steel and if they were experienced in building sailboat rigging. Their answer to both questions was yes and they gave me a very encouraging cost per foot estimate. For about the cost of the bare wire rope to do it myself (not including tools, thimbles, and sleeves), they could do it all. That’s what I call a no-brainer.
Following are approximate costs per foot (in 2014) for standing rigging from several popular sources compared to the rigging company in my area.
Popular online Catalina parts retailer: $4.00/ft. complete West Marine: $1.02/ft. cable only McMaster-Carr: $0.85/ft. cable only Local industrial rigger: $1.13/ft. complete
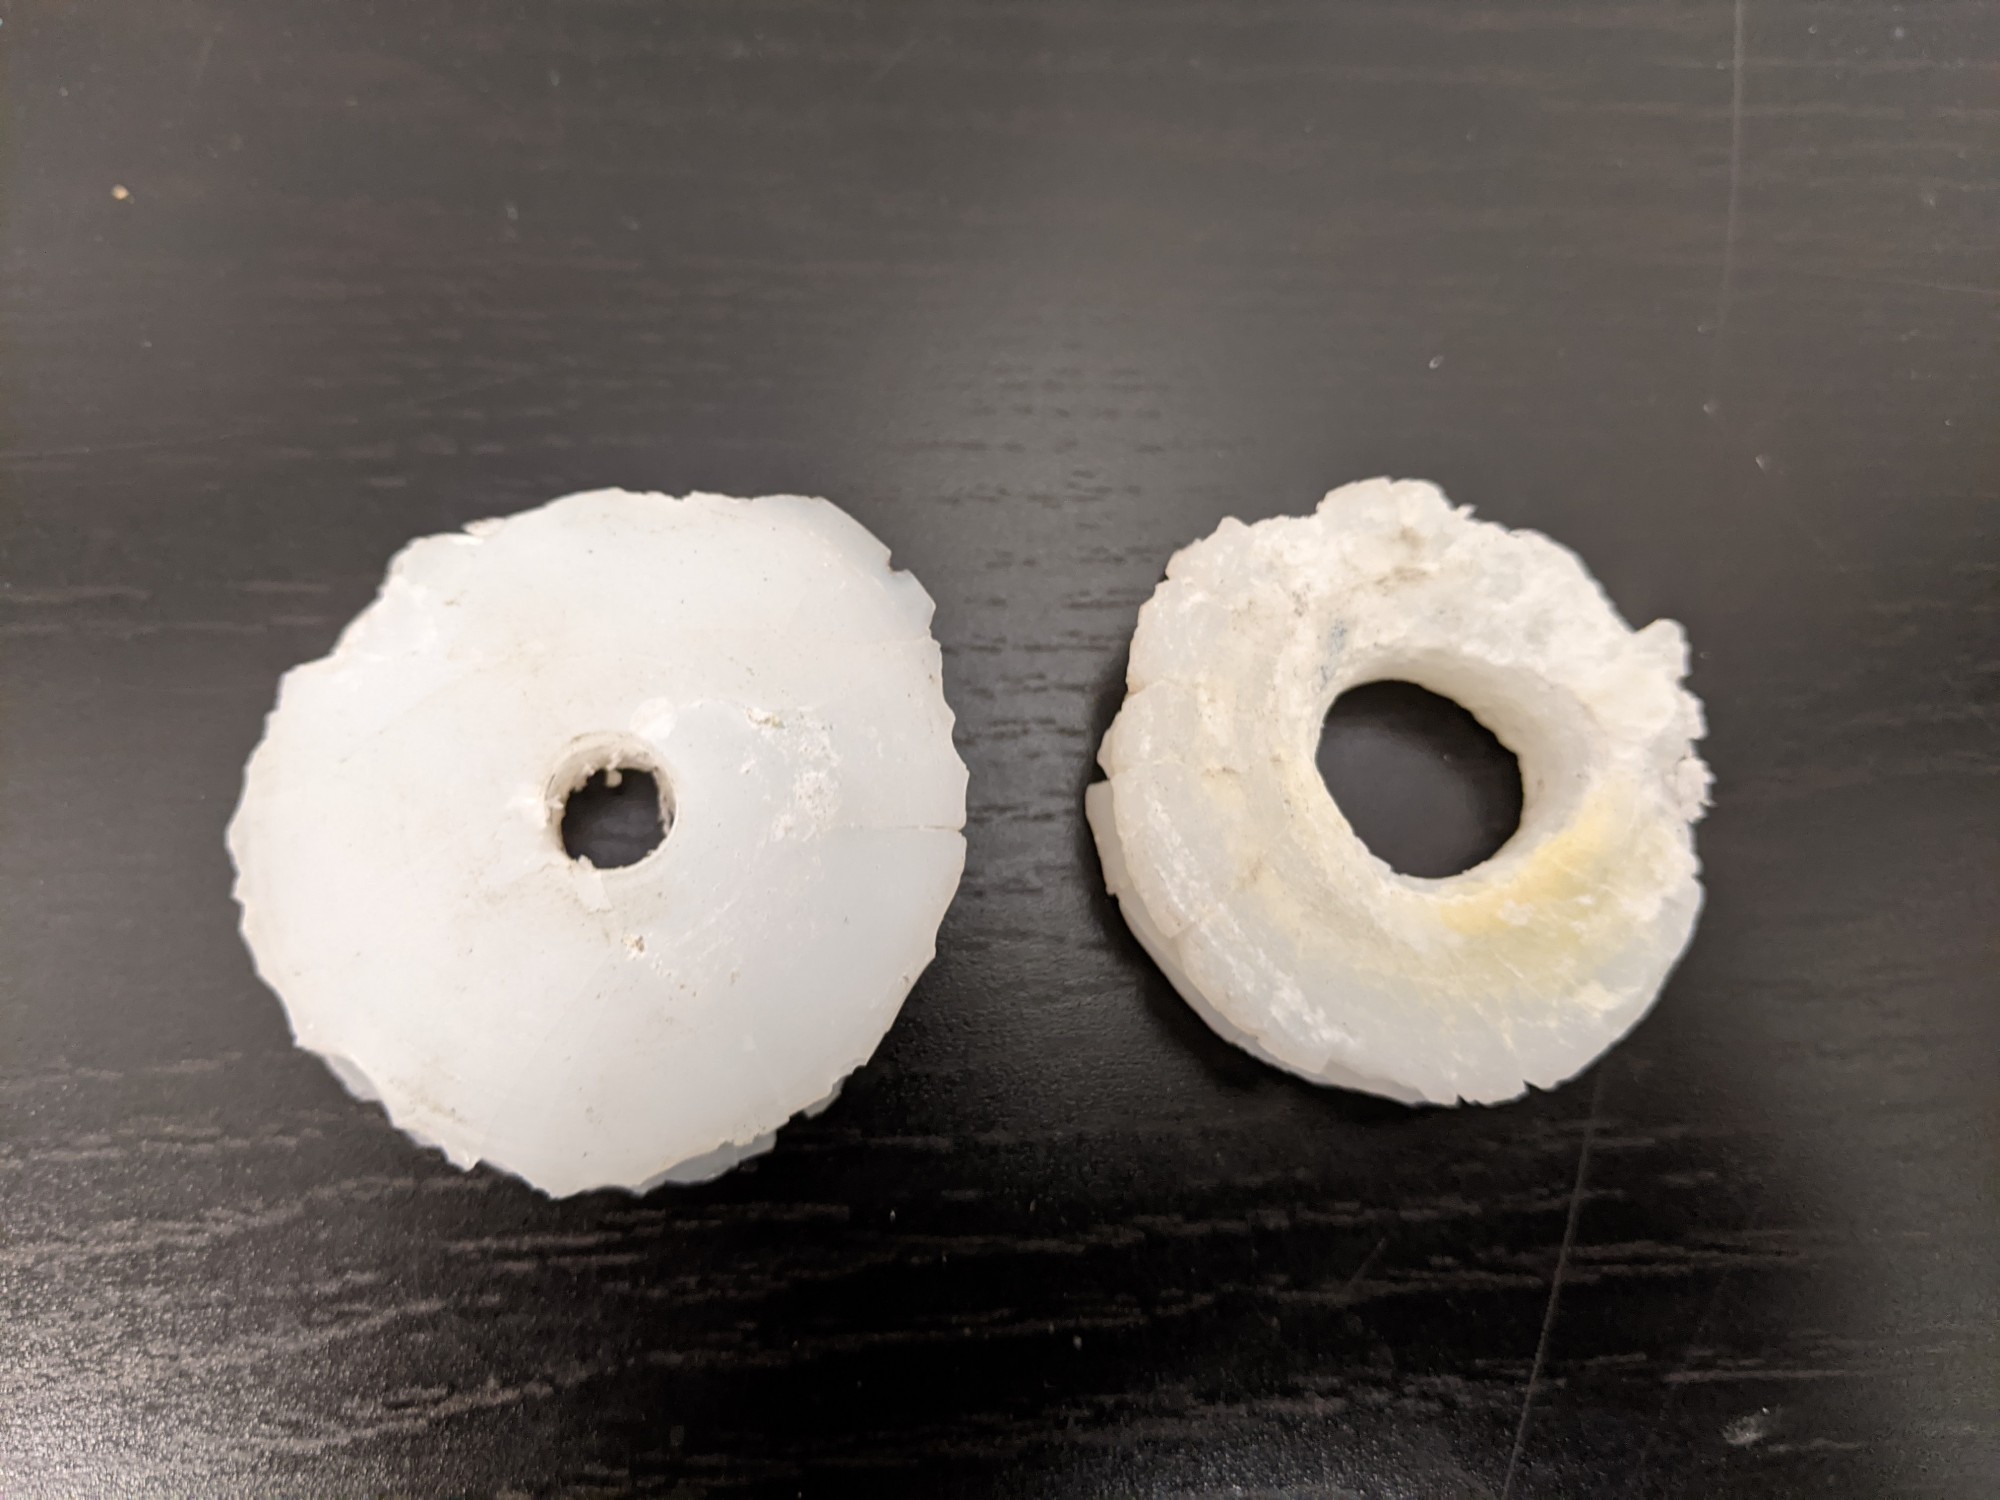
I met with Cory at Broadway Industrial Supply and was surprised to learn that they fill many orders for stainless steel wire due to its popularity for architectural railings. I decided to have the shrouds made out of 316 stainless steel with thimbles and Nicro Press sleeves rather than roller-swaged terminals for two reasons: cost and simplicity.
The newer, roller-swaged style fittings are significantly more expensive than hand-pressed sleeves. The common reasons for using the new fittings are: there are fewer parts to maintain, fail, or chafe sails, and their ability to withstand a higher percentage of the breaking strength of the cable. I do admit they look really nice. Proponents make impressive claims about their superiority over the more primitive pressed sleeves. But the fact remains that pressed sleeves have been used successfully for decades in a multitude of application, are still an accepted industry practice, and even as bad as my rigging was, they performed well.
In all of the pictures in this post, the rigging tape was removed from over the swaged fittings to show their condition and workmanship.

A few words about cable types
When working with a rigger, especially an industrial rigger who may not be familiar with sailboat rigging, it’s important that you specify the correct cable type for strength, chafe avoidance, and rust resistance.
Regular steel wire rope like you can find in a home improvement or hardware store will not last long in a marine environment. Fuggedaboutit. Only stainless steel will survive and, among the different types of stainless steel cable, there are a couple of common choices. The first is 304 grade, which is slightly stronger but is less corrosion resistant or 316 grade, which is slightly less strong but more corrosion resistant. The difference between the two grades is due to the chemical composition of the metal. Your choice as to which grade to use should be made with consideration of the type of sailing you usually do (cruising or racing) and the water that you sail in (fresh or salt water).
Besides the material that the cable is made of, the construction is also important. The most common constructions that you will see are 1×19 (1 strand of 19 wires) and 7×19 (7 strands comprised of 19 wires each). The two types have different strengths, stiffness, and stretch. For applications where ease of bending and use with blocks is more important and the amount of stretch is not as important (wire to rope halyards, for example), 7×19 cable is better. In applications where minimum stretch and maximum strength are important and stiffness is not important (standing rigging, for example), 1×19 is best.

Lastly, there’s the matter of cable diameter. Your sailboat was originally equipped with cables of sufficient diameter for its design and intended use. Seldom is it beneficial to oversize the rigging diameter for racing or to endure abuse or neglect. Doing so just adds to the cost and weight aloft for negligible benefit so stick with the original diameters.
What not to do
Substandard rigging workmanship isn’t hard to spot once you’ve seen the right stuff. The cable should fit tightly around the thimbles, which should not be too small or too large for the cable diameter or the connection pin. The sleeves should be the correct size for the cable and the sleeve seam aligned perpendicular to the eye opening. Each sleeve should have the correct number of evenly spaced crimps that are appropriate for the cable diameter. Two sleeves should be pressed at each end with a space between them equal to one to two cable diameters. The cut end of the cable should extend completely through the second sleeve but not more than one cable diameter farther so as not to create frayed wires that can snag sails and skin.

The old rigging on Summer Dance was a mix of 1/8″ 1×19 wire rope (right side of the big picture) and 5/32″ 7×19 wire rope (left side of the big picture). The oversize 7×19 cables weren’t even installed in the same locations on opposite sides of the boat, which probably produced uneven loading of the mast from one side to the other.

Standard wire rope lengths
Here are the lengths of the cables for a Catalina 22 with standard rigging. All cables are 1/8” diameter, 1×19 construction.
| Forestay | 26’ – 5 ½” | 1 |
| Upper shrouds | 25’ – 3” | 2 |
| Forward lower shrouds | 12’ – 10 ¼” | 2 |
| Aft lower shrouds | 12’ – 11 ¾” | 2 |
| Non-adjustable backstay | 28’ – 2 ¼” | 1 |
| Stock adjustable split backstay | 24’ – 1 ¾” | 1 |
| Stock adjustable split backstay bridle | 4’ | 2 |
Now’s the time to customize your rigging
Shortening or lengthening your running rigging is fairly easy and most of us have done it at some time to optimize how it works. Once your standing rigging is built, however, except for significantly shortening a cable, any other changes usually require complete replacement of the part, which can be several times the cost per foot of running rigging. So when you order your standing rigging is the time to consider any length changes for things like:
- Different type of backstay (fixed or adjustable )
- Different length turnbuckles
- Extra mast rake angle
- Quick release levers
- Other modifications that can’t be accomplished with your current rigging.
Remove, replace, retune
To make it easier for Broadway Industrial Supply to build my rigging, I removed the old rigging and dropped it off with them for reference. If you do the same, label each cable so that you know where it came from. If your new rigging arrives without corresponding labels, you can at least match up the lengths with the old rigging to figure out where they go.
About a week later, I picked up the new rigging and was impressed with the quality of workmanship. All of the eyes were consistently and accurately formed. I had given my rigger a supply of white, heavy duty heat shrink tubing similar to what was on the original rigging. I asked him to put two pieces on each cable before making the eyes, enough to cover the crimped sleeves to prevent snagging and chafing the sails and running rigging. A few minutes with a heat gun sealed them all shut. Last, I slid white vinyl cable covers on the lower ends of all of the cables to prevent chafing the running rigging.
Installing the new standing rigging is simple for a trailer sailor after the mast is unstepped:
- Remove the clevis pins at each end if you haven’t already, replace the old cable with the new cable, and reinstall the clevis pins. Now is also a good time to install all new cotter pins or rings to leave no doubt as to the integrity of your connections.
- Step the mast back into position. You might need to first loosen any overly short turnbuckles.
- Tune the rigging as you normally would. I own a Loos tension gauge and its been a good investment to keep all the stays and shrouds at proper tension. For more about tuning and tension gauges, see How To Measure Standing Rigging Tensio n .
Open body vs. closed body turnbuckles
If you’ve done this job before, you might be asking, “But what about the turnbuckles, $tingy?” I chose not to replace my turnbuckles at the same time and that is reflected in my overall 70% cost savings over retail. My reasoning was not simply to save money, though. That was secondary. The biggest reason was that my existing closed body turnbuckles were still in good condition and I’m not convinced that open body turnbuckles are absolutely necessary, contrary to what many riggers will tell you in order to sell you more hardware.
I regularly disassemble, clean, inspect, and lubricate all of my turnbuckles. That alone negates the biggest reason given by the open body turnbuckle proponents. Yes, a tiny bit of water and dirt can get in those tiny holes in closed body turnbuckles. Yes, it won’t dry as fast as in an open body turnbuckle. But there’s also much less of it in there to begin with and to work its way down into the threads and corrode them compared to open body turnbuckles.
Another reason that proponents give for open body turnbuckles is that it is harder to see if a closed body turnbuckle is overextended. My rebuttal is that anybody who adequately familiarizes themselves with their closed body turnbuckles (through regular maintenance is a good way) should have no trouble recognizing whether a turnbuckle is overextended or not.
Moreover, my closed body turnbuckles are only exposed to fresh water so salt water corrosion isn’t a concern. I’ve also replaced some of the T bolts that were bent due to incorrectly rotated chain plates so those threads are new. If you’re not sure if your chain plate bolts are turned correctly, read Turn Those Chain Plate Bolts!
Open body turnbuckles are great, especially if you’re going to neglect their maintenance. If I needed to replace my turnbuckles, I’d give more consideration to open body ones. But body style alone isn’t enough reason for me to throw hundreds of dollars of working hardware away for shiny new hardware. Nuf said.
It’s now been almost ten years since I replaced by standing rigging this way and I have not had a single issue with it. And I sometimes push my rigging hard. If I ever need to do this job again, I’ll probably do it the same way.
Would you like to be notified when I publish more posts like this? Enter your email address below to subscribe to this blog and receive notifications of new posts by email. You will also receive occasional newsletters with exclusive info and deals only for subscribers and the password to the Downloads page. It’s free and you can unsubscribe at any time but almost nobody does!
Share this:
25 thoughts on “ how to replace your standing rigging for less ”.
Stingy, I really enjoy your common sense approach to boat projects, Thanks for sharing! Another thing I have seen done by cruisers on a budget is to use 2′ to 4′ of the appropriate strength galvanized chain from the chain plates to galvanized open body turn buckles that attach to the rigging. These short lengths of chain keep the extra weight down low and keep the “budget” turnbuckles up away from the elements a bit and seem to last 10 to 15 years with proper maintenance and care. Galvanized is also not prone to the “invisible” failure fractures that even good Stainless is. If you are on a budget, you can either do what works to keep moving or sit there and grow barnacles while you wait for your (money) ship to come in! Keep up the great posts!
Good advice, Warren. I can’t help but think that sailors were some of the original MacGyvers, making and fixing things with only what they had on hand and lots of ingenuity.
- Pingback: Five swing keel maintenance blunders and how to prevent them | The $tingy Sailor
Stingy, I live inland and it is difficult to source knowledge, sail rigging and assorted parts. The more detail and source info you add is appreciated tremendously and if you get some money for the link good for you. If you can edit your post to add in size of shrink wrap dia. and dia. + length of vinyl covers it would be very helpful. I was even wondering if you remembered the length of the forward shrouds after converting over to quick release system I just found a 1982 and this will be my first upgrade for money well spent. There is allot of older Catalina 22s out there in disrepair or missing parts and fewer places to ask questions. This web site is fantastic you have great ideas, thank you for taking the time to share your lessons learned and Catalina 22 knowledge.
I know what you mean. Even though we sail most often on Lake Pend Oreille where there’s a very active sailing community, we don’t live there and so can’t take advantage of their clubs to exchange knowledge. I’ll try to remember to add more detail to my posts for those who need that level of info. One of my challenges is to also make this blog general enough to be relevant to as many pocket cruisers as possible.
I believe the heat shrink tubing that I used on my standing rigging was this: 1/2 in. White Polyolefin Heat Shrink Tubing (3-Pack) . It needs to be only large enough to slip over the crimped sleeves then shrink as small as possible. That particular tubing only shrinks down to about 1/4″, so it won’t be tight around the 1/8″ shrouds but it keeps sails and lines from snagging on the thimble and sleeve edges and the wire ends. It also gives the rigging a more finished, professional look like the original rigging.
I shortened my forward lower shrouds 8-1/2″, which is close to the closed length of each quick release lever of 8-3/8″ from the bottom pin to the top-most pin position of the lever. They have two more top holes spaced 1/2″ apart that are lower that you could also use. The amount you shorten the shrouds by isn’t critical since you will leave the turnbuckle attached above the lever for fine tuning. As for the actual length of the shrouds, they should be about 12’10-1/4″ before shortening according to this diagram from the 1987 Owner’s Manual but double-check your current lengths first as there was considerable variation between boats and years.
By the way, here’s ads for two levers currently on eBay: NEW JOHNSON MARINE QUICK RELEASE HIFIELD LEVER STAINLESS SAILBOAT Hobie Shroud Extender Quick Release Hyfield Lever 1/4″ Holes 10049
Best of luck with your purchase. I hope you get a good one and we’ll see you around here as you fix her up!
Great information $tingy! One thing people may want to keep in mind, especially if they’re salt water sailers, is that the heat shrink will hold moisture at the swage and it’s virtually impossible to inspect for corrosion in that area already, even without the heat shrink. it’s a trade off one needs to conceder when building new rigging. what I do on my own boat is to leave it bare, but slip a short (12-16″) piece of 1″ pvc pipe over the lower end the the shrouds, which also covers the adjusters. moisture doesn’t collect and the cable ends, cotter pins, and other poaky things are kept away from your sails.
That’s a good point, Russ. It really is a trade-off. The tubing can help prevent water from getting into the swages in the first place but if it does, then it’s trapped there longer before it dries out. Ideally, after a five years or so in a salt water environment, we should cut the tubing off and do a closer inspection, then tape back over them.
Ironic that you should mention PVC turnbuckle boots. Watch here the day after Christmas 🙂
Where is the rigger located? In FL, by any chance??
In Spokane, WA, but there should be industrial riggers in your area. Look for one that supplies stainless steel cable for architectural hand railings, it’s the same stuff.
How did you achieve the making of the backstay with the pigtail? Did the maker create the braiding necessary to create the pigtail? e.g. Backstay, split backstay, split backstay bridle.
If you’re referring to the short pigtail attached to a single backstay that is used to hold up the boom when the mainsail is lowered, yes, the rigger made a new pigtail on the new backstay. If you’re referring to the adjustable backstay that I recently wrote about, I did not make a pigtail on that backstay. I use the topping lift instead.
I am finishing a homemade sailboat. Landlocked in Kansas. No stainless steel cables in stock, I have checked. Willing to order the 1 x 9, 1/8″ 316 cable and do the swaging myself. Planning on using eye and turnbuckle studs,at the ends of the cables as I do have turnbuckles left from another boat. These are for standing rigging. Question: can I use a swager tool bought from lowes for under $30 to get this job done on such small diameter wire?
If you’re talking about the Blue Hawk Swaging Tool model AC1058 item 348539 , then yes. That’s the same type of tool that most riggers use. There is a smaller tool that is made like a pair of dies with bolts that you tighten with a wrench to make the crimps but I’d shy away from it. Just use copper ferrules and observe the guidelines that are available only from rigging companies like Loos & Co so that you use the correct number, position, rotation, and spacing of ferrules, thimbles, and crimps.
Best of luck finishing your project! $tingy
Hi $tingy, I believe the issue that Russ mentioned regarding the extra corrosion from putting the heat shrink on the fitting isn’t so much the trapping of the moisture but the lack of oxygen to the surface of the stainless steel. Stainless can cope with moisture excellently as long as it has access to oxygen to enable it to build up a protective oxidation layer. For the same reason many riggers advise against taping up stainless fittings. Love the article though, and I’d be interested to find out what you think about Dyneema as an alternative to rigging with stainless.
Hi, Matthew
I think Dyneema is an interesting alternative and might have an advantage in some applications like high performance racing due to its very low weight aloft and the simplicity of low friction eyes instead of traditional blocks. But for the average guy cruising and club racing, it’s a novelty and he’s better off with standard parts and the wide availability products and services. I have a friend who pursued the synthetic route and by the time he was set up to make his rigging and factoring in the extra labor for splicing and pre-stretching plus the shorter lifespan of Dyneema it wasn’t any more economical.
Thanks for your question, $tingy
Great article, I am going to do exactly what you did including the addition of levers on the forward lowers and forestay. I also like the swaged eyes on both ends of the wire instead of swaged threaded stem. Do you happen t have the hole to hole measurements of the wire you had built? That would save me a bit of measuring. You mast lowering video showed me how to lower the mast single handed while the boat was on the mooring. The only hiccup I had was the mast wanted to swing from side to side when it got near the Mast-up. But no damage done.
I don’t have my exact forestay measurement handy but it’s the standard length shown in the table in the article. I didn’t modify it for a quick release lever, I simply replaced the turnbuckle with the lever and set the mast rake angle with the adjustment holes in the lever and fine tune it with my adjustable backstay.
The mast will want to swing a little from side to side when you’re raising or lowering it so just be careful for the first 45 degrees or so until the shrouds start holding it centered. If you use a 1/4″ hinge bolt in the mast step instead of the stock 5/16″ bolt, it will allow a little wiggle room without binding or bending plus it’s easier to insert and remove. That bolt never really has a load on it so strength isn’t an issue.
Check out the Dyneema! https://www.riggingdoctor.com/life-aboard/2015/8/10/synthetic-rigging-conversion We have guys in the marina with it almost two years on and zero signs of deterioration. They get remnants from cordage houses pennies on the dollar. I would have replaced with the synthetic but I was too much of a newb. No more stainless cable for me.
Hi, I’m surprised that no one has mentioned a concern about using two different metals, stainless, and copper, for these hand-pressed sleeves. In a marine environment, aren’t you guys concerned about corrosion? Worst of all, you have no way of seeing the progress of the corrosion. I’m going with the traditional rolled stainless swages or maybe even drop forged, which I just discovered here: https://www.savacable.com/Content/Images/uploaded/sava_cat.pdf (see p. 16) Thanks, Rick Owner of a Merit 25, with 3/16th head stay and back stay.
Hi, Richard
Stainless steel and copper are very close to each other on the nobility scale so they do not react to one another very much at all. Just look at the pictures in this post of the over 30-year old rigging. The sleeves are still holding strong and the wire underneath them is unaffected. Metals that are far apart from each other like stainless steel and aluminum will react to each other noticeably as I show in Beware of Galvanic Corrosion! so that’s why you would not want to use aluminum sleeves.
You mentioned using 1/8″ 1×19 wire for standing rigging. Would the running rigging for a Catalina 22 use the same diameter for 7×19 or does it need to be larger? Also, what size would you recommend for the keel-lifting cable? I didn’t see it listed in the keel maintenance article.
If you have half wire, half rope halyards and want to keep them that way, use the same diameter in 7×19. The keel lifting cable is the same diameter too. For more about replacing your standing rigging, see How to Replace Your Standing Rigging for Less . And for more about the keel lifting cable, see point #3 in Five Swing Keel Maintenance Blunders and How to Prevent Them .
Best wishes, $tingy
Interesting, I compared your lengths with the book that came with my boat and with real life lengths after a mast failure and that is what I found (totals): Forestay is 27′ 5.5″ Upper shrouds 25′ 11.75″ Forward lower shroud 13′ 6″ Aft lower shrouds 13′ 4.75″ Why? I don’t know, but I had to redo several lines (not very complicated process and cheap). Thanks for rough measurements as it allowed to arrive to some measurements.
What year is your boat? The lengths that I gave are from the owner’s manual for the pre-’86 design.
Lots of very useful information here to save money when on a limited budget without sacrificing safety
Leave a comment Cancel reply
This site uses Akismet to reduce spam. Learn how your comment data is processed .

- Already have a WordPress.com account? Log in now.
- Subscribe Subscribed
- Copy shortlink
- Report this content
- View post in Reader
- Manage subscriptions
- Collapse this bar
Sailboat Repairs & Rigging
- Swaging and splicing
- Running rigging replacement
- Standing rigging replacement
- Lifeline and stanchion repair and replacement
- Deck hardware sales and service
- Spar and boom service and painting
- Hydraulic service
- Liferaft and man overboard equipment service
- Hatch and portlight replacement and re-bedding
- Sail handling systems repair
- Keel and rudder fairing
- Bottom paint

- Paint & Glass Work
- Sailboat Repairs & Rigging
Visit our Popular Forums
- Monohull Sailboats
- Multihull Sailboats
- Powered Boats
- General Sailing
- Antares Yachts
- Fountaine Pajot
- Lagoon Catamarans
Cruising Business
- Boat Classifieds
- General Classifieds
- Crew Positions
- Commercial Posts
- Vendor Spotlight
Life Aboard a Boat
- Provisioning: Food & Drink
- Families, Kids, & Pets Afloat
- Recreation, Entertainment, & Fun
- Boat Ownership & Making a Living
- Liveaboard's Forum
Seamanship, Navigation & Boat Handling
- Seamanship & Boat Handling
- Training, Licensing, & Certification
- Health, Safety, & Related Gear
- Rules of the Road, Regulations, & Red Tape
Engineering & Systems
- Const. / Maint. / Refit
- Product / Service Reviews
- Electronics: Comms / AV
- Electrical: Batts / Gen / Solar
- Lithium Power Systems
- Engines & Propulsion
- Propellers & Drive Systems
- Plumbing / Fixtures
- Deck Hdw: Rigging / Sails
- Aux. Equipment & Dinghy
- Anchoring & Mooring
Photo Categories
- Member Galleries
- Life Onboard
- Sailing in the Wind
- Power Boats
- Cruising Destinations
- Maint. & Boat Building
- Marine Life
- Scuba Diving & Divers
- General Photos
Recent Photos

Listing Categories
- African Cats
- view more »
- Crew Wanted
- Crew Available
- Enhance Your Account
- Meet the Mods
- Meet the Advisors
- Signup for The Daily Cruiser Email

| |||||||||||||||||||||||||||||||||||||||||||||||||||||||||||||||||||||||||||||||||||||||||||||||||||||||||||||||||||||||||||||||||||||||||||||||||||||||||||||||||||||||||||||||||||||||||||||||||||||||||||||||||||||||||||||||||||||||||||||||||||||||||||||||||||||||||||||||||||||||||||||||||||||||||||||||||||||||||||||||||||||||||||||||||||||||||||||||||


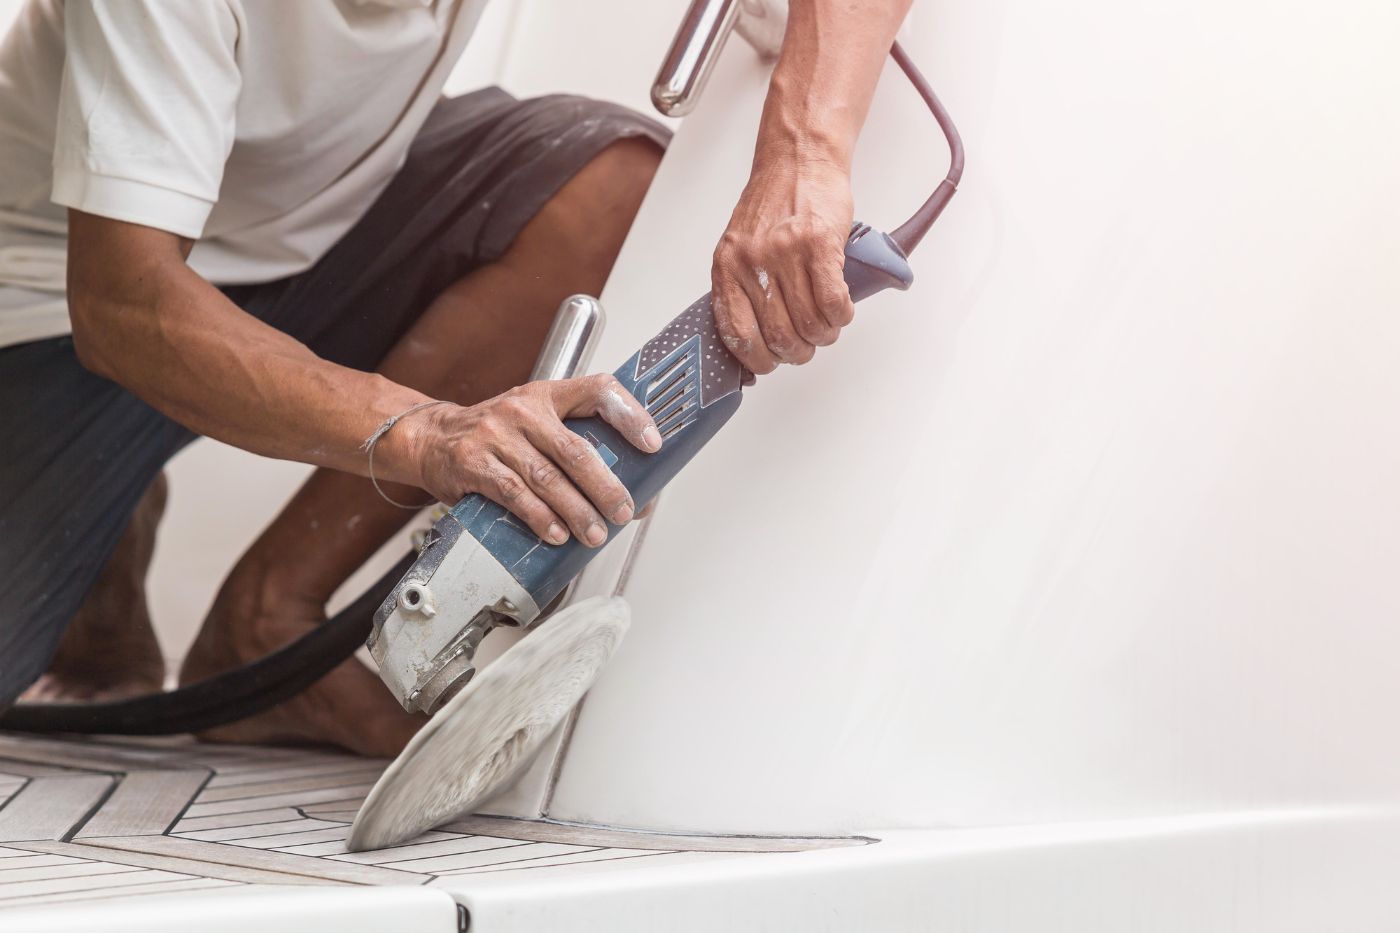


IMAGES
COMMENTS
Small sailboat (up to 30 feet) A 25-foot sailboat may require replacement of the forestay, backstay, and upper shrouds, which could cost around $2,500 to $3,500, including the cost of the rigging and labor. For small sailboats, the cost of replacing standing rigging can range from $2,000 to $5,000.
Good question. Yes, doing it yourself will theoretically save money. For an average 40-foot boat, Cockerill estimates about $100 per foot to re-rig with wire rigging ($4,000), as well as the round-trip cost to haul and launch the boat and unstep and step the rig (an additional $2,500 or so).
The estimated cost of replacing your boat's running rigging with sheets is around $1,700-$2,000+. For an average 40-foot boat, you can expect to pay around $4,000 for wire rigging replacement, which may include control lines. The average maintenance cost for boats under 30 feet is around $255 per month, or just under $3,000 per year, so you ...
For a small boat (under 30 feet), you can expect to pay anywhere from $500 to $2000 for standing rigging replacement. For a medium-sized boat (30-50 feet), the cost will be somewhere between $2000 and $4000. And for a large boat (over 50 feet), you should budget for at least $4000, and potentially much more depending on the size and condition ...
The cost of replacing the standing rigging will vary greatly depending on the size of your boat and the location you get the job done. For my 41 feet sloop, I did most of the installation myself and paid approximately $4700 for the entire rig replacement.
The cost to replace standing rigging obviously varies from boat to boat. Give us a call, and we can give you a rough quote. With proper measurements (wire diameter, pin sizes, wire lengths), we can give you a very accurate price for the standing rigging itself, but there are often unforeseen complications during the job (bad spreaders, corroded ...
The cost of rod rigging replacement ranges from $8,000 to $20,000. The cost of materials averages from $5,000 to $10,000, while the cost of labor is between $2,000 and $5,000. Expenses for equipment range from $1,000 to $2,000, while the cost of permits or inspections is estimated to be around $500 to $1,000.
Aug 14, 2015. It's one of the most important features on a sailboat, but many owners put standing rigging at the back of their minds when it comes time to do their pre-season safety checks. A prudent sailor should inspect his or her standing rig at least once each season and should know when the time comes to replace most or all of it.
Inadequate rig tension can lead to excessive wear on other components such as sails or mast fittings, increasing their replacement frequency and cost. In conclusion, understanding and valuing the importance of standing rigging on a sailboat is essential for sailors of all levels.
Once you have confirmed the wire diameter, the approximate length and identified the terminals, top and bottom, it is a simple online exercise to get an accurate estimate of the replacement cost on Standing Rigging. Alternatively, Team Jimmy Green can produce a costing based on the same information.
3,705. Catalina 30 Mk II Cedar Creek, Bayville NJ. Jan 7, 2019. #7. Doc, I had all new standing rigging put on my 93 C30 TR last spring. $1795 plus tax by professional rigger. I like to and mostly have done my own work but when it comes to standing rigging, I know my limitations.
That's what I call a no-brainer. Following are approximate costs per foot (in 2014) for standing rigging from several popular sources compared to the rigging company in my area. Popular online Catalina parts retailer: $4.00/ft. complete. West Marine: $1.02/ft. cable only. McMaster-Carr: $0.85/ft. cable only.
Swaging and splicing. Running rigging replacement. Standing rigging replacement. Lifeline and stanchion repair and replacement. Deck hardware sales and service. Spar and boom service and painting. Hydraulic service. Liferaft and man overboard equipment service. Hatch and portlight replacement and re-bedding.
Seems like a lot for a 40' boat. I have got quotes for sails for my 40' boat and they range from $8k for a jib and a main and I replaced the standing rigging on my boat. That cost me $10k. This was rod rigging and increased the price quite a bit. if it were wire you could get away for about half that price.
Run your fingers up and down the last metre of wire above or below the swage, feeling for deformities; if the wire is not uniform the chances are that one of the individual wires has broken, even ...
Please note: Returning custom-made rigging will incur a 35% stocking fee. Does your boat have wire-to-rope halyards? This calculator specifies only all-rope halyards. Go to wire-to-rope halyards. 1-2-3 Done So select your boat, choose a color, decide if you want a shackle spliced on, and you're done.
The average annual maintenance cost of sailboats is between $2,000 - $3,000. However, larger boats of 30 feet and up will cost considerably more. The actual total annual cost is $3,000 to $7,000, due to other recurring costs like docking and insurance fees. However, what you'll actually pay really depends on the type of boat you have and what ...
Sailboat standing rigging maintenance, repair and replacement with photographs. Helpful information on re-rigging your boat by Chuck Rose. Home. The Logbook. The Crew. ... The lowest cost would be for you measure the old rigging and order new stays and shrouds with swaged end fittings from a chandlery (West Marine offers a rigging service that ...
A broken headstay led to a full rigging overhaul. Learn how one sailor transformed his broken boat back into a sailing machine. Standing Rigging Replacement Ronnie Simpson. Reaching out of the channel in a moderate breeze, Quiver leaned on her big, overlapping genoa and accelerated up to hull speed. Surrounded by a fleet of vessels of similar ...
The cheap part of re-rigging is the cost of the wire and fittings. The expensive part is paying for the labor to install the rigging. For reference the total cost of the wire and swaged end fittings for our 36' boat was only about $3500. We removed the rigging and sent it to Rigging Only in Fairhaven, MA. They duplicate the rigging and sent it ...
Why we chose synthetic rigging for the backstay on our sailboat, Totem. By Behan Gifford August 23, 2024 ... why didn't we replace all of our standing rigging with it back in 2019? Well, we did think about it. At the time, Jamie chose wire because of the cost of additional hardware necessary in the shift to synthetic rigging. We simply didn ...
running rigging replacement cost for a 30ft. I had an idea to hire out running rigging replacement on a 30ft sloop, with nothing fancy, just a double braid polyester. The estimate turned out to be 1700-2000+. So I told the rigger to replace just the main halyard for now (and I will do the rest by myself).