Injectadeck Marine Structural Foam DIY
Marine deck repair DIY fix soft spots instantly

About Injectadeck

Injectadeck is a carefully engineered structural marine foam and adhesive that cures hard as wood, quickly and easily repairing soft spots on your boat’s fiberglass deck caused by rot of the underlying core. Injectadeck saves you from having to peel up your deck and replace it – costing thousands of dollars and weeks or months of time. With Injectadeck, your deck can be fixed in a single afternoon – Really!
Injectadeck is exactly what it sounds like – you drill a few holes in the deck, inject the two-part product into the holes, and it quickly expands to fill the void left by rot, making your deck strong, solid, and stable once again. It is water-catalytic and becomes more adhesive when it contacts moisture, absorbing wood pulp and adhering to the fiberglass layers. Traditional adhesives (epoxy, etc.) simply cannot do this. Injectadeck requires just a few holes to be drilled and is even known to reverse moisture meter tests by displacing and absorbing moisture inside the deck. Injectadeck is light, waterproof when cured, exhibits no shrinkage over time, and has an antibacterial/antifungal agent to help stop the rot. Injectadeck fills out the soft spots in a boat’s decks, hatches and gunwales quickly and efficiently by filling the void and curing solid. Injectadeck is perfect for rescuing your boat-for-sale or classic keeper – any boat is worth saving with Injectadeck!
Background – Injectadeck was created by an aerospace applications engineer who has relied on various structural foams to provide lightweight solutions for Air, Land and Sea applications. He needed a solution for his aging boat’s rotted deck and, finding that none existed, he set about creating an efficient repair method. Since that humble beginning, thousands of boat owners all over the world have relied on Injectadeck to get more than a few more seasons out of their boat, saving their craft from the dreaded scourge of deck rot.
The problem – Once a screw has entered a fiberglass sandwich core, moisture will start to seep in, a little at first, but later it pours in. Gravity and wicking action bring the moisture to the bottom layer of fiberglass. In many boats it forms an entire lake, lowering the vessel’s center of gravity and waterline! Once water collects, the rotting process starts working up from the bottom and, by the time you feel a bad spot, it’s more than halfway rotted through and working its way upward.
The Engineering challenge – Since the inception of foam-filled products like boats and surfboards, to modern day aircraft applications, the problem with two-part structural foams has been that they expand quickly and uncontrollably when mixed and require large holes for “the pour”. In addition, they do not address the issue of accumulated moisture, or varying levels of moisture in the deck cavity which also cause the foam hardness to vary. The more water, the more expansion, and hence lower density, making other foams unsuitable. Once cured, Injectadeck is a hard and resilient structural foam (consistency like wood) that can support heavy loads with little or no collapse of the closed-cell waterproof structure. Expanding six to eight times its volume, it’s a dense foam which you could dent…with a hammer. Most boat decks, particularly older ones, are wet rotted and perfect candidates for this product. With Injectadeck’s latest formula and process we are able to adapt to all voids wet and dry resulting in a solid deck you can feel good about. The more water you drain out the harder the foam density.
*TESTIMONIALS*
- World Racing Champion Leon Lance; “I repaired my J24, it worked out so well, I sell & rep the product and Injectadeck sponsors us”
- John Satazahn Seattle WA “I installed it my trawler top bridge, a lot of water came out and I passed the moisture survey”
- Mike H. L3 Eng, Crestview FL “I ordered my Injectadeck kit on 10/2 and it came fast, 3 days”
- Jim Stubbs Tampa FL “ 45′ Silverton rotted gunnels, I used a 2″ clear plastic tube on the and run in the gunnels, for my injections, Survey passed!
Questions? Call the Tech Line 727-768-7509
Affiliate sales program: [email protected]
Sorry no returns on international orders or domestic, it’s an 8lb box
The Injectadeck Team
Privacy Overview

- Boat Accessories
- Where to Buy

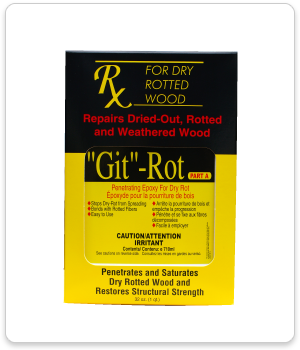
Special until September30th: 20% off Git-Rot (all sizes). Use Code SEPT24 at checkout. *restrictions apply
Free ground shipping in the Continental US for any orders over $150!
Sailboat Deck Repair Guide...
Sailboat deck repair guide.

A sailboat is only as good as two things: the people sailing it, and the materials keeping it afloat. And though you may be an expert navigator and sailor, sometimes, the latter can disappoint you. That’s when it’s time to dust off the work gloves and consider handling some light repairs yourself. But how can you do a sailboat deck repair your own—and is it worth the extra time and labor? Here are a few tips for handling your sailboat deck and keeping it in tip-top shape.
Know Your Sailboat Deck—And How to Repair It
It starts with a basic understanding of your sailboat deck. According to Sail Magazine , many “decks are cored with end-grain balsa or plywood with a fiberglass laminate on each side.” If this is the case for you, you might notice that moisture can work its way into the core of the deck, which tends to rot the quality of the wood over time.
When the plywood core of the deck goes bad, it will generally be better to replace this plywood rather than work around the issues. However, try to get a second opinion before you start tearing out old decking. For example, you might be able to use:
Liquid LifeSeal® Sealant 5.2 fl. oz. Clear
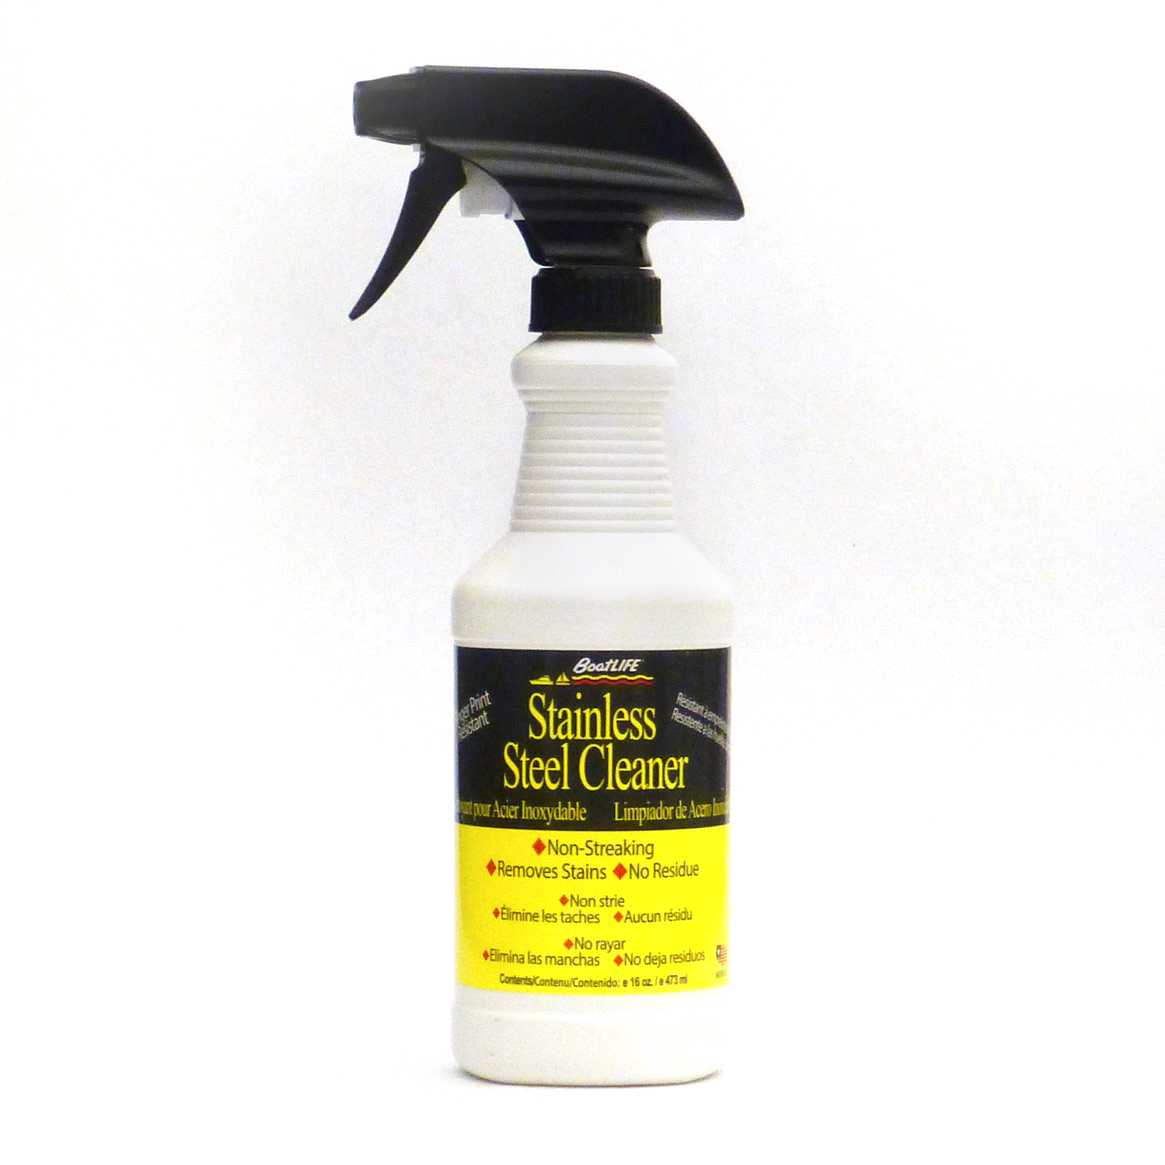
Stainless Steel Cleaner 16 fl. oz.
Related blogs, updated how to use “git”-rot.
**This is an update to a previous post, “How to Use “Git”-Rot””. The presence of wood rot can ruin any […]
Thanksgiving Trivia!
Happy Thanksgiving! Thanksgiving is one of America’s oldest and most loved holidays. Although the story is steeped in a dark […]
Detailing Your Boat
On a warm summer day with the sun shining, there’s no better way to spend your time than by hitting […]
All products proudly made in the usa

- New Sailboats
- Sailboats 21-30ft
- Sailboats 31-35ft
- Sailboats 36-40ft
- Sailboats Over 40ft
- Sailboats Under 21feet
- used_sailboats
- Apps and Computer Programs
- Communications
- Fishfinders
- Handheld Electronics
- Plotters MFDS Rradar
- Wind, Speed & Depth Instruments
- Anchoring Mooring
- Running Rigging
- Sails Canvas
- Standing Rigging
- Diesel Engines
- Off Grid Energy
- Cleaning Waxing
- DIY Projects
- Repair, Tools & Materials
- Spare Parts
- Tools & Gadgets
- Cabin Comfort
- Ventilation
- Footwear Apparel
- Foul Weather Gear
- Mailport & PS Advisor
- Inside Practical Sailor Blog
- Activate My Web Access
- Reset Password
- Customer Service

- Free Newsletter

Dufour 44 Used Boat Review

Blue Jacket 40 Used Boat Review

Catalina 270 vs. The Beneteau First 265 Used Boat Match-Up

Ericson 41 Used Boat Review

How to Create a Bullet-Proof VHF/SSB Backup

Tips From A First “Sail” on the ICW

Tillerpilot Tips and Safety Cautions

Best Crimpers and Strippers for Fixing Marine Electrical Connectors

Solving the Dodger Dilemma
Polyester vs. Nylon Rode

Getting the Most Out of Older Sails

How (Not) to Tie Your Boat to a Dock
Fuel Lift Pump: Easy DIY Diesel Fuel System Diagnostic and Repair
Ensuring Safe Shorepower
Sinking? Check Your Stuffing Box

Why Choose the Wharram Design?
Winterizing: Make It Easy With Checklists

Boat Improvements for the Technically Illiterate

What Do You Do With Old Fiberglass Boats?

Stopping Holding-tank Odors
Giving Bugs the Big Goodbye

Galley Gadgets for the Cruising Sailor

The Rain Catcher’s Guide


Sailing Gear for Kids

What’s the Best Sunscreen?

UV Clothing: Is It Worth the Hype?

Preparing Yourself for Solo Sailing

R. Tucker Thompson Tall Ship Youth Voyage

On Watch: This 60-Year-Old Hinckley Pilot 35 is Also a Working…

On Watch: America’s Cup

On Watch: All Eyes on Europe Sail Racing

Dear Readers
- Boat Maintenance
Deck Core Repair, from Underneath
Laminating small sections at a time can make working against gravity easier than it looks..
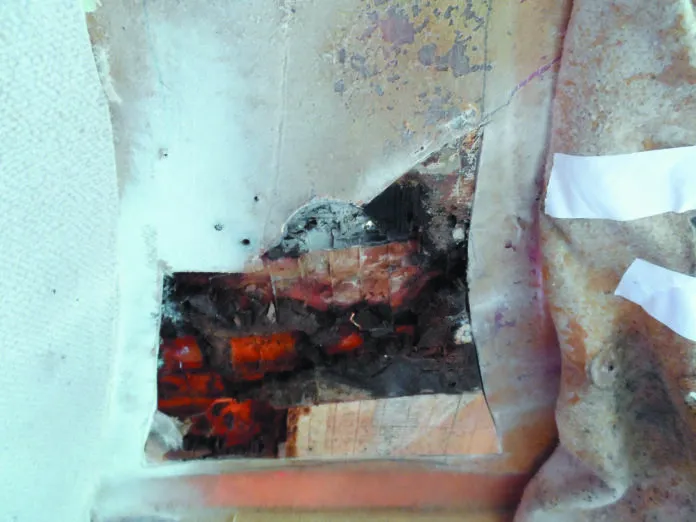
One of the “never-evers” of boat building is to use high density polyethylene (HDPE) as a backing plate or load bearing spacer, but the builder did just that. The plastic can split under load, allowing the fitting to wobble, gradually turning the bolt holes into egg shapes, and allowing water into the core. Yes, the builder should have sealed core surrounding the bolt hole with epoxy but they didn’t (see the Inside PS blog post “ Rotten to the Core ”). The plywood backing plate was saturated and rotted, followed by about 2 square feet of core in the surrounding area, mostly down slope. Thankfully, there were barriers of solid glass that positively prevented further spread.
We considered injecting the core with a polyurethane foam or epoxy (see PS July 2020, “ Can Glue Injection Fix a Rotten Core? ”). But a cursory inspection revealed that the core had the consistency of wet peat moss, so we decided surgery was the only truly reliable repair. Someday we will sell the boat, and we believe that repairs should always be at least as good as the rest of the boat. We also don’t care to own a boat that we know is rotting on the inside. It just doesn’t feel good.
Working overhead is more complicated than working from the top, where gravity helps hold things in place, but assuming some sort of hull liner, you can avoid the cosmetic challenges of perfect fairing, gel coating, color matching, and matching non-skid patterns. If you can overcome the access challenges and don’t have a lot of fancy joinery to remove, working from inside can be easier, with just a little added know-how. The approach is particularly suited for times of year when weather would prevent working outside without a full tent or indoor storage.
GETTING READY
Ventilation is critical. Place a box fan in a deck hatch to ventilate the cabin. Do this first, to reduce heat in summer, and prevent the accumulation of dust and fumes. You’ll still need a full-face respirator at times, but moving large volumes of air away from the work space greatly improves safety, neatness, and comfort. Be sure to use a NI0SH approved respirator (see PS September 2017, “The Best Respirators for the Boatyard”). Remove cushions and cover everything. It’s easy to get epoxy where you do not intend. Determine the original inside glass layup. Either research forums, take a core sample, or take a close look at what you cut out. Consider adding one additional layer, since your hand-layup may not be as efficient as the vacuum-bagged original.
GETTING STARTED
Cut the inner skin. An angle grinder with a cut-off blade is fast, dusty, and can cut the upper skin too unless you are well-practiced. Alternatively, an oscillating multi-tool is slower, but controllable, safe, and can reach more areas. We used both. A drywall knife and electric drill with a cup brush are helpful for removing core. A flat disk wire wheel is useful for getting under edges. It is smart to keep the molded fiberglass boundary of the core area intact; this provides a thickness reference point and makes finishing much easier. Clean it out the core beneath this boundary area with the flat wheel. Later, you will fill it with thickened epoxy, slide the new core inside, and then wrap the glass over the nice curved transition. Remove only core you can get without damaging the skins. Often isolated sections will be undamaged, sealed off by epoxy that saturated the kerfs in the balsa. There is no reason you can’t leave these pieces in place if they are sound.

Don’t be tempted to reuse the existing skin. It is probably damaged, or will be in the removal process, and more importantly, there is simply no way it will conform tightly to the new core. There will be gaps, which are vital to avoid.
The same goes if you are working from the topside and there is non-skid you would like to preserve. It will be very challenging to close the seam and still preserve the original appearance. New glass layers will be much stronger. In most cases, it is easier to use a paint or a non-skid gelcoat mold to match the old non-skid. Gibco makes flexible repair molds that match most patterns ( www.gibco.com ), but you can also make your own for much less money using an old hatch or a piece of deck as a pattern (grist for another DIY report).
Remove any carpet adhesive about 2 inches back from the margins. This will be the bonding area for the new skin. Do not attempt to just sand it off; it is gummy and the residue will be pushed farther into the surface rather than removed. Instead, get what you can with a scraper if soft, or a wire cup brush in a high speed drill if is dried and crumbly. Wipe up the rest with acetone, and then sand.
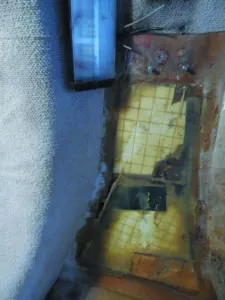
INSTALLING THE NEW CORE
Replace any plywood backers where hardware penetrated with either solid glass or Coosa Board. Ply wicks water even faster than balsa. In properly installed balsa, the kerfs are well sealed with epoxy, preventing water from spreading through the laminate. Coosa Board is strong enough in compression for most bolting loads and will not wick water, making it safe even without an epoxy seal (See PS February 2020, “ Tough, Versatile Coosa Board, Suitable for Many Projects ”). If you need more strength, add an extra layer of 1708 cloth to the inside skin while it is open, fill with Coosa Board, and add an extra layer on the outside, too.
If it is not pre-scored, score the foam core to create kerfs. These will allow the core to bend to match curved surfaces (see PS October 2007, “ In cored hull construction, does high-tech mean high-quality? ”). It should be floppy in your hands. Pre-scored Corecell is not floppy enough to conform to curved decks. Scored end grain balsa is fine.
Apply thickened epoxy to the core with a grooved spreader. You can make one in a few minutes from the small disposable spreaders with a razor knife. About 3/16-inch thickness is about right. The mixture should be thick enough to stick over head, but thin enough to flow into the kerfs. Mayonnaise is about right.
Install the core in small sections. More than one square foot is just too hard to handle overhead, and there is no strength advantage in using big sheets. Core can be cut into small pieces to fit odd spaces. Putty-in the gaps and roll firmly with a grooved roller to create a bond and force the epoxy up into the kerfs.
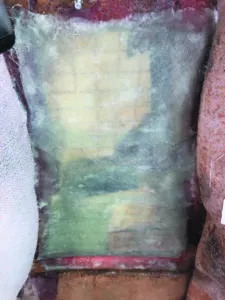
Let the core bonding epoxy cure. Sand off smooth. An orbital sander will work, but be gentle because core will sand easily. You want a smooth surface so that the glass will go on smoothly. If there are rough areas after sanding, apply a thin layer of mayonnaise-consistency thickened epoxy over the bad areas; you can glass right over this while it is still curing.
APPLYING THE NEW SKIN
This step requires some previous experience with laminating fiberglass, the free downloadable West Systems guide can walk you through the process ( www.westsystem.com/wp-content/uploads/Fiberglass-Manual-2015.pdf ). Use only small pieces of cut glass, about the size of notebook paper or strips no wider than six inches. Gravity is working against you, and any bigger sizes will not stay in place while the epoxy cures.
Pre-wet the fiberglass on a large plastic cutting board or similar work surface by pouring thin streams of mixed epoxy resin and working it into the glass with a spreader. Be certain to wet the edges or these will fall down when placed overhead. Do this before placing it on the ceiling. Trying to apply epoxy overhead with a brush is a nightmare.
Press the pre-wet pieces in place like sticking pizza dough to the ceiling. Use one-inch overlaps. Once placed, roll out air bubbles with a grooved roller. The pieces should become uniformly translucent, and the excess epoxy will come to the top, where it will help saturate the next layer you place. Add additional epoxy overhead with a brush as needed, but don’t put much on the brush and do this only for touch-ups.
Don’t apply more than a few layers before the underlying layers have kicked to a slightly firm state. With fast hardener and warm conditions, this should take only 20 minutes or less. Excessive layers can exotherm, becoming very hot. This weakens the epoxy, can cause bubbling and distortion, and it will reduce the working time of subsequent layers below the practical limit. Second, multiple layers get heavy and may fall off. You don’t need that kind of frustration.
Change gloves often. They get sticky as the epoxy starts to kick and pull threads from the cloth. Every 10 minutes is not too often. Wipe your tools down at the same time.
CLEANING UP
Wipe everything down with vinegar when you are done, keeping it away from the repaired area. This will neutralize small smears of epoxy that suck under the drop cloths, allowing them to be cleaned up later. Clean your tools, first with vinegar, then with soap and water. Acetone can also be used to wipe up any thin remnants in areas where soap and water are not practical.
FINISHING UP
Reinstall the liner and the cosmetics are done. In general, there is little need for finish sanding or fairing. There is no need to use finish glass or veil mat, just 1708 biaxial or equivalent to match the preexisting lay-up.
Install all hardware with epoxy plugs and good bedding. You don’t want to do this again!
Unless you have a lot of finely finished teak joinery to remove, this is a two- to four-day job. Day One you pull the liner off, investigate the damage, and plan. Day Two you tear off the skin, remove core, and dry (with the wet core gone it dries fast), and put the new core up. Day Three you sand the core and apply the new skin. Day four, you replace the liner and install hardware.
Like many boat projects, if you did it right, the result is invisible. Only you know that she is now as good as new. At least in this one area.
Some of the wiring on my Corsair F-24 is run inside the cabin, on top of the liner but hidden from view behind removable strips of carpet (actually a surface cover fabric marketed as “Frontrunner”). The fabric is adhered with Velcro. This same trick works for disguising seams, where the liner does not fit back together perfectly. Cut strips about 1 ½ inches wide with a hot knife to prevent fraying. You can also cut with scissors and coat the edges with latex varnish, which is less visible than solvent varnish. Lightly coat the backing with 3M Super 77 spray adhesive, and apply the hook portion of self-adhesive Velcro. This will allow self-adhesive Velcro to bond permanently. These “hider strips” will stick to the carpet liner, securing the wires in an accessible and chafefree manner, and disguising new seams. So long as they run along natural corners, they are unobtrusive.
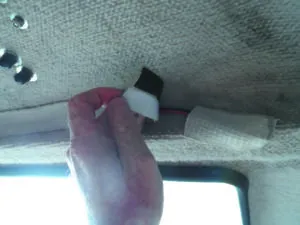
1. The hook portions of Velcro tape — one black strip and one white stripe were glued to this fabric carpet strip of the same color as the liner to hide wiring.
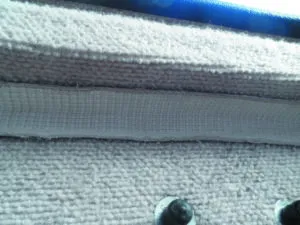
2. Here we use a strip of Velcro-backed matching towel to hid a seam in the liner where two sections of liner joint
RELATED ARTICLES MORE FROM AUTHOR
Two additions.
1. The necessity for drying the opened area needs to be stressed. 2. After too much resin in my hair after using countless gallons in aviation and boat repair, I lay up cloth on plastic sheets. I mark off the size on the work table lay on the plastic taped in place and then add the layups wetting the glass as I go. After rolling it out with a ribbed roller to rid the fiberglass of bubbles and excess resin, I use a pizza cutter to cut the layup to size and carry to the repair area. On an under surface I leave the plastic in place until it at least starts to set helping it stay in place. Then for cosmetics I replace the plastic with peel ply. Come back the next day, no sags, no drips, no frustration with all laminations done first on my lamination table.
LEAVE A REPLY Cancel reply
Log in to leave a comment
Latest Videos

The Performance Sailboat from Island Packet: Blue Jacket 40 Boat Review

Top 3 Winter Boat HACKS!

Cabo Rico 34 Boat Review

Super Shallow Draft Sailboat: The Leeboard Sharpie
Latest sailboat review.

- Privacy Policy
- Do Not Sell My Personal Information
- Online Account Activation
- Privacy Manager

- Forum Listing
- Marketplace
- Advanced Search
- About The Boat
- Gear & Maintenance
- SailNet is a forum community dedicated to Sailing enthusiasts. Come join the discussion about sailing, modifications, classifieds, troubleshooting, repairs, reviews, maintenance, and more!
Cored deck soft spot repair
- Add to quote
Hi, I know this has been asked here before, I did a search on this forum and many others but still have a few questions. I’m new to doing work on boats and I just recently moved into my ’76 Catalina 27. I got the boat for a pretty good price and it seemed very solid. I also did have several people in the know (as far as boats are concerned) tell me the same. I have been noticing a few smaller soft spots on the deck lately (forgive my terminology or lack there of) near the edge of the deck on the side where the mast stays are bolted down. I have one soft spot on the port side that is about 2-3 sqft and another in the same place on the starboard that’s about 1 sqft. I’ve been doing a lot of research about how to fix this. I am a bit concerned with the location of the spots due to the fact that my rigging is bolted there, which is most likely what caused it anyway (water seeping through the bolt holes.) I did notice that it looks like some glass work has been done in that area on the port side before so maybe its possible it wasn't done right the first time. Either way, Im planning on waterproofing all my bolt holes on deck when I figure out what I’m going to do about the soft spots. I’ve read about the “drill and fill” options where you basically pump epoxy into the core but have found very few people actually advocating this. I know that injecting epoxy into a hole full of wet (Im assuming) plywood isn’t going to solve anything, but I live aboard in a marina in the Tampa area, it rains a lot, and if I start cutting my deck apart to replace an entire section of core, I have no idea (whether being in a boat yard, or in my slip) how I’m going to keep everything dry. Im not even totally conviced I can do it myself. Im pretty handy but Im not completely sold on the idea of tearing into my deck. Is there anyone out there who has done this themselves or who has had success with the drill-and-fill method? Any thoughts at all? I am planning a haul out towards the end of the year (after the rainy seasion) so I could do the work while on the hard but it will all still be weather permitting. Any advice or comments would be greatly appreciated. Thanks, Nick
I would first suggest that the rigging attachments of your shrounds to the chainplates and the security of your chainplates is most important; however, the soft spots in your deck would be more of a cosmetic than a structural problem. I'm assuming your chainplates pass through this deck and are fast secured to structures beneath the deck. I have repaired several areas of my deck across the state from you, but also in rainy Florida. I far prefer the removal of the layer of fiberglass above the wet core and replacing the core. I used a rotary tool (like a Dremel) with a cutting wheel to remove the deck top layer and scraped out the sodden core. After this task, that can be completed in a couple hours, you can brush in a thin layer of epoxy to seal your work from the afternoon thunderstorm. After positioning your new core and grinding it to a level prepared for replacing your deck plate, you can again finish your morning work with a brushing of epoxy to seal for rain. Be sure to "feather" the seam at the perimeter of your repair to extend the surface area of the bond between your new deck surface and the old so that cracks won't develop outlining your repair. Take care and joy, Aythya crew
Well, I have 3 side stays on that side, and all of them are in the area of the soft spot. They are bolted directly into the deck with a small piece of aluminum ( about 4 inches long) on the inside of the cabin as a backing plate. Ive looked at other setups of chain plates where they are built into the corner of the structure and mine are not light that. My deck is just glassed into the corner of the hull and I have a single timber support right under the mast that holds up the deck. My prime concern is that if the deck gets too soft, those stays might start to come up and then Ive got a full thickness problem. My second concern and the only reason I got this deep in thought about it, is if there is water in the core causing the delamination, its only a matter of time before it spreads across more of my deck. Am I right? I am perfectly comfortable in leaving it and writing it off as a causmetic issue if it doesn't get any worse. I just won't step there if I don't need to, but Im concerned that next year, theres going to be another square foot worth of soft and the job gets bigger. I appreciate that you walked me through the job, that helps a lot. Thanks, I guess I just needed to hear from someone who's actually done it out in the elements. I know I can attach the stays to the toe rail to do the job and I will definitely make improvements to my chain plate situation when the job is done. I plan on painting the entire deck shortly after I finish the job. You mentioned feathering out the finish to prevent cracking, but you never mentioned actually glassing over it after its done....Would you glass it or just epoxy it since Im basically just replacing the old glass back in its place? Also, as far as getting a new piece of core to fit, is there any trick to that? There is a slight curvature to the deck and I have a feeling that its not going to be the easiest thing in the world to get a brand new piece to just fit in nicely. Any thoughts on this? Thanks a lot for all the info so far.
sync said: You mentioned feathering out the finish to prevent cracking, but you never mentioned actually glassing over it after its done....Would you glass it or just epoxy it since Im basically just replacing the old glass back in its place? Click to expand...
I've had excellent luck using a "drill and fill" technique for soft decks on my 1974 Catalina 22. It's important to dry the deck core completely first- I was lucky and mine was already dried out. I've heard you can dry it out with many small holes, and displace some of the water with a solvent, like acetone. On mine, I drilled a few holes, and glued film canisters over them with a hole drilled in the bottom- as funnels. I kept these full with unthickened west system epoxy, and pushed on the deck with my hands to "pump" the epoxy between the fiberglass and the wood core. After hardening, I removed the film canisters, chamfered the holes with a drill bit, and filled with gel-coat patch. It's been one year, and these parts of the deck feel more solid than the rest of the boat still.
As an alternative filler consider either chopped glassfibre or chopped carbon fibre in resin which you can buy in large amounts quite cheaply from automobile repair supply shops. I have used the carbon fibre variety as a core when filling in a cut out in a sandwiched ply and glassfibre bulkhead.
Awesome info....Ill look into the chopped glass and resin. Im sure my core is wet, before I do the repair, I need to fix a lot of improperly installed hardware on the deck thats been leaking. (Im almost positive its the chainplates leaking most of the water.) Anyone ever used CPES? Ive been reading about it and it seems like it works really well if the deck is dried completely. Also, Im planning to hollow out and make an epoxy bed around my chainplates so this doesn't happen again. Casioqv how big were the soft spots you fixed? I have a pretty large but narrow area, approx. 5 ft. x 1 ft. along the portlights where the port stays are bolted into the deck. Im looking seriously into CPES but Im thinking it would be better, and not much more work or expense just to recore.....I just dont like the idea of cutting up my deck when Ive never worked with fiberglass before. Thoughts anyone?
Sync How did your repair go? I have recently purchased a 1974? Catalina 27. Guess what... a soft spot around the stanchion nearest the side stays. Fortunately it is small and contained to that area immediately around the stanchion. However, the proximity to the stays does concern me. The last owner lived aboard and did not sail or maintain the boat as she should have. It looks like the stanchion should have been re-bedded or at least sealed because it appears to have been leaking for a while. The soft spot appears to only extend about an inch maybe two from the base of the stanchion. I am curious to hear about the experience, technique and results. Anyone else with Catalina soft spot experience is welcome to chime in. My previous boat (the one soon to head to craigslist) is a Catalina 22... love/d it... but I wanted a little more room inside. Thanks Wingnut247 Washington State
This, like most other "quick-fix" methods generally results in a pretty lousy repair. Epoxy does not adhere to wet core materials as a general rule and this type of repair doesn't really dry the core out. In most cases, the water has taken months to penetrate the balsa core, and unless the core has disintegrated almost completely, it will take a long time for it to yield up the water it has taken so long to absorb. Letting the epoxy saturate the area in this method will make replacing the core material when you do a proper repair job much more difficult. If you're going to fix this, please do it the right way and remove one side of the laminate, clear out the wet core material and then replace it and then glass in a new skin to replace what you removed.
A couple of steps I would take Congrats on the recent purchase. Good luck with her. If it was me, here is what I would do: 1) The water coming into the deck is the first problem. This is likely leaking around penetrations for deck hardware (i.e. the bolts that hold down stanchions, cleats, jib tracks, chain plates, etc.). This is called "re-bedding" and is not uncommon; I have a 2001 Catalina 310 and I have to deal with this issue this spring. I would suggest you go to Maine Sail's site and searching these forums for details on how to do this. 2) If you core damage around the deck hardware, you should fix this before you re-bed the hardware. Again, not uncommon (I have this issue around one of my stanchions). And again I would recommend you look at Maine Sail's site and search the forums for details on how to do this. It is called "potting". 3) Then, if the deck damage is bad enough, look at the epoxy injection or core replacement. Hope this helps. JK
JKCatalina310 said: Congrats on the recent purchase. Good luck with her. Click to expand...
JKCatalina310 said: If it was me, here is what I would do: 1) The water coming into the deck is the first problem... I would suggest you go to Maine Sail's site and searching these forums for details on how to do this. Click to expand...
JKCatalina310 said: 2) If you core damage around the deck hardware, you should fix this before you re-bed the hardware... Click to expand...
JKCatalina310 said: 3) Then, if the deck damage is bad enough, look at the epoxy injection or core replacement. Click to expand...
JKCatalina310 said: Hope this helps. JK Click to expand...
TravelinEasy— Doing a core repair like what you describe isn't rocket science and doesn't require a whole lot in the way of esoteric tools or knowledge. Depending on the size of the area, your skill at fiberglass repair, and such, you could probably do this for less than $500 or so in materials in a weekend. Several of the boating magazines have had articles regarding this exact subject in the past five years.
West describes the procedure that Dog and Maine are strongly suggesting here .
I will be dealing with this type of repair in the coming weeks so I have an interest in this thread. The repair solution SD and maine are proposing makes sense in my circumstance with one small but important problem, the cosmetic finish of the deck after the repair. I have minor water damage(as far as I can tell) around one of my stanchion bases and could "fix" the problem by drilling holes thru the non-skid, and then re-paint the non-skid(currently non-diamond finish). If I cut thru the deck to repair/replace the core as suggested I will have to re-gelcoat. So, does anyone have any advice or can you point me to a resource that can provide info on how to apply gelcoat? I understand that I will not get a perfect colour match but I am hoping for something close. Any thoughts? John
johnnyandjebus said: I will be dealing with this type of repair in the coming weeks so I have an interest in this thread. The repair solution SD and maine are proposing makes sense in my circumstance with one small but important problem, the cosmetic finish of the deck after the repair. I have minor water damage(as far as I can tell) around one of my stanchion bases and could "fix" the problem by drilling holes thru the non-skid, and then re-paint the non-skid(currently non-diamond finish). If I cut thru the deck to repair/replace the core as suggested I will have to re-gelcoat. So, does anyone have any advice or can you point me to a resource that can provide info on how to apply gelcoat? I understand that I will not get a perfect colour match but I am hoping for something close. Any thoughts? Click to expand...
Greetings all, if you use a ink refill syringe small holes on 45 degree angles pump in unthickened epoxy, this will bond together and gives good results. If using from undernithe small hole lets the wet area drain and can be blocked with a match or twig. when you have drilled your holes put some tape over the same selotape or insulation tape, pierce with needle of seryinge when epoxy ouses out wipe and place heavy weight over to keep constant pressure over area when cured remove weights and tape this should leave a nice neat neary, undetecable repair. Weather is a joke from God we just make use of it so enjoy what he gives. GO SAFE
Soft spot projects have a tendency to grow. These are pictures from a spot spot project last winter in my cockpit sole. The plan was to cut out plywood core around pedestal and replace it with solid glass. The boat was indoors in a heated space and had about 2 months to dry out. After cutting out suspect area we checked surrounding area with a moisture meter and found water had migrated. Ended up replacing entire cockpit sole. Plywood in aft area, solid glass in are where rudder posts and pedestal penetrated the sole and balsa in forward area of the cockpit. I ended up having it done professionally although I would have done it myself if I had the time. Cost around $2700 Things we found out. Once water saturates a core there is no good way to completely dry it out in place. Areas where there are deck penetrations should be solid glass. I probably never have to worry about this area again.
Recore pics Oops. Pics didn't load the 1st time.
Attachments

Proper job! Much better than leaving that nasty soggy rotten plywood insitu and dripping in some epoxy and hoping for the best.
Whoever came up with the drill and fill method should be shot on sight. Or even better, drilled with holes and filled with something painfull, and then shot. Yes I'm bitter. All the deck area on my boat was drilled with holes in a 2x2in grid pattern and filled with epoxy. The decks were not soft, so maybe this method does "work". However, there were large areas of rotten core, and soaking wet core. I probably pulled gallons of water out of my decks. The boat had always been stored inside heated so this wasn't an issue. I have no doubt that one winter in freezing conditions and the boat would've been FUBAR. So I'm doing the proper core repair, cutting the top skin off, pulling out the balsa core and replacing. Not a bad job really, but made so so soooo much worse by the idiots doing the drill and fill bs. Really fun to pull the top skin and the core out when you have an epoxy column to cut through every two inches, and a pile of nasty half rotten wood half epoxy layer on the bottom skin to grind off. Someone's previous "repair" has increased the time on my end 10x easy. Drill and fill should only be used in delaminated areas that have a completely dry and sound core. Otherwise you're just giving the finger to whatever poor sob comes next.
Damn fine job Sync. Hiya Memo! (Ajax)
Great job ... but I would still make some changes Very nice job, and thank you for sharing! I have pretty much the same job in my close future (in a month or so). There are two things that I am thinking about doing differently than you. One is to use epoxy all the way. I know it is more expensive than poly resin but with all the labor involved, I don't care if the materials are 20 bucks more or less, I want the best material, period. The second is, instead of using one long strip of plywood, I am considering cutting it into several smaller pieces (not sure yet how small) and basically butt-end them with thin epoxy seams between them. This is for two reasons. First, as you emphasized, the deck is not flat as the plywood sheet which required you to do quite a bit of grinding and sanding. I hope to minimize this by using smaller pieces. Second, plywood is known to transport water along its grain. If, Heaven forbid, there is another water intrusion in the future(despite the counter measures you describe and that I will also adopt), I hope that it will then stop at the boundaries between the pieces. Comments welcome!
I like the idea of separating the core into smaller pieces. I wish I would have thought of that. I did it in two pieces. I also cut the topskin off in two, more manageable pieces. I definitely recommend that, it made my life so much easier when I went to relaminate everything and replace the skin. Its also a good idea just to use epoxy all the way through. I didn't know enough about the difference between the two until I had already committed. I just went with what they recommended. Again, you can't very well disagree with someone who used to build boats for a living, at least I couldn't at the time. I did use almost 2 gallons of boatyard polyester by the time I was done though...its about $40 a gallon, so that would have gotten a bit pricy....But I agree, if you're going to go through all those headaches, you might as well do it right. Use epoxy, use poly, just stay away from that bonding putty.... As for the drill and fill option, I think it has its place in the very small and isolated areas. If it is less than 2 square feet, and hasn't spread farther than that, there isn't that much moisture there.....As long as you dry it out as much as you can, I don't see a problem with it. After doing a full recore, theres no way I would go through all that trouble for one or two isolated spots....Just my very humble opinion..... Anything bigger than the 1-2 feet, I wouldn't use it. There are plenty of people in my marina who have used that method with success. I live next to a guy who has been a naval engineer for 30+ years and has fixed his deck several years ago using Rot Stop. Its still solid as a rock.... Again, small isolated areas of course. The area I used it on was only about 16" x 8"
What is the story with Epoxy and Polyester? I did not think Polyester would bond to Epoxy. So say I have a fiberglass boat and I don't know if it is poly or Epoxy- do I use Epoxy to make sure it bonds?
Most boats were built out of poly with a bunch of secondary poly bonds and did petty good BUT every piece of original poly secondary bonded bulkhead or other part i have repaired came apart to easy Any of the original layup done in one piece is brick sh## house strong So they will both work with the correct technique BUT i have found epoxy to have a lot more ability to be blended with different fillers and hardeners
- ?
- 176.4K members
Top Contributors this Month

- Forums New posts Unanswered threads Register Top Posts Email
- What's new New posts New Posts (legacy) Latest activity New media
- Media New media New comments
- Boat Info Downloads Weekly Quiz Topic FAQ 10000boatnames.com
- Classifieds Sell Your Boat Used Gear for Sale
- Parts General Marine Parts Hunter Beneteau Catalina MacGregor Oday
- Help Terms of Use Monday Mail Subscribe Monday Mail Unsubscribe
Wet core repair without major surgery.
- Thread starter Hayden Watson
- Start date Oct 7, 2017
- Forums for All Owners
- Ask All Sailors
Hayden Watson

Wow, that's great. Where did you inject the epoxy?
Nice job. Our boat also had elevated moisture, but after fixing the leaks, it gradually dried out. I was told by our surveyor that it may dry on it's own once the leaks are gone. Now if I could just find that last leak. I have no moist deck to help me locate it. Ken
Wednightracer said: Sounds like a plan except the core is shot. Plywood falls apart after being soaked in water. You could get most of the water out but the leftover plywood would have the structural integrity of dust. Here is a pic of me digging out the wet plywood from my cockpit sole. It had been in a heated dry building for 2 months. The plywood had no structural integrity and literally crumbled. The resins holding the plywood together were totally compromised. View attachment 141650 Click to expand
Great technique. Thanks for sharing it. Do you have any pictures of the deck to vacuum ports. I am curious how you made them air tight also how you controlled the epoxy distribution. Nice work.
Nice innovation! I wonder whether the hardened epoxy, which is now thickened with the plywood dust, will maintain enough elasticity to support the deck, or will it crack under loading?
Very interesting! What do you think of drilling many small holes through the bottom of cored laminated deck when the boat is built. leaks would show up immediately while draining and liquid spread would be limited.
I will try to answer questions in order from my last post. njlarry: Sorry, no photos. Making airtight connections for vacuum application is easy. I attached the ports by sticking the end into the bolt holes and then sealed them with a blob of Maine Sail's butyl caulk. At the crack I placed a worm of butyl in a ring around the crack and used a piece of heavy plastic film (old clear shower curtain). I used a hole punch to make a hole that the tubing was threaded through and sealed it to the film with butyl. As soon as the vacuum was applied it would suck down tight with no leaks. It is most important to get everything air tight. You test this by turning off the pump and timing how long it takes for the vacuum to be released. Distribution to the core was done by pulling the deck to a full 30" vacuum. I let the pump run for several hours prior to the infusion while I was preparing all of my stuff. This way any air void in the deck was under a near perfect vacuum. The vacuum was released by flowing the epoxy into the voids during the infusions process which draws the epoxy into all of the voids under vacuum. agprice: In a composite sandwich you do not need elasticity, you need rigidity. In sections where the ply had turned to dust, the epoxy would be a solid block. In sections where the ply was honeycombed, the epoxy would form a lattice which is supported by the remaining wood which is encapsulated in epoxy. In areas where the skin had delaminated from the ply the epoxy would bond the ply to the skin. All of these result in the desired result. RoyS: In the case of my 1988 Catalina 30 the deck is constructed in two pieces. The outer deck is a structural sandwich panel consisting of FG skin / plywood / FG skin. The interior head liner is a separate molded FG liner. The two are joined together by smearing in blobs of Mish-Mash and gluing them together. I could not see the inner skin of the sandwich and drilling holes through the head liner in most cases of deck leak would not show anything. In my case I had a direct path from the outside to the headliner / deck gap because the through bolt was not sealed. agprice22: Catalina did not use end-grain balsa or foam core in 1988. they used exterior grade plywood. End-grain balsa or foam would have limited the problem to a much smaller area than I had to deal with.
Sorry, I did not take any pictures. suffice it to say that it looked like a patient on life support with tubes running everywhere.
How did you connect multiple 1/4" plastic tubes to the vacuum pump?
Any way I could find. Mostly I used aquarium stuff from the pet section at the Walmart. I took a photo of my stuff but cannot find out how to upload it.
Here is a photo of my gear. pretty basic. For infusing I used one port to pull a vacuum on the whole system and then put an aquarium 1/4 turn valve on each port with a short stub of tubing. I then used a an epoxy syringe with the plunger removed for a funnel. With the value closed it would stick the syringe into the tube, remove the plunger, top off with epoxy and open the valve pulling the epoxy into the deck. when one port would stop taking epoxy, I would stick the plunger in an pressurize to force more in. this would also cap the syringe so that I could move it to the next port.
Attachments

I mentioned that I checked the moisture content of the core to determining when it was dry. I used a $40 Ryobi Pinless moisture meter and it worked great. http://www.homedepot.com/p/Ryobi-Pi..._8903vry57826_pcrid_73529852758671_pkw__pmt__
Wow, Lots of great information. Thanks for posting.
Nice job Hayden. This is pretty much how resin transfer molding works. What did you use for resin and how much did you mix at a time?
This is the product that I used although others might also be suitable. https://www.fisheriessupply.com/system-three-epoxy-clear-coat-penetrating-epoxy-0600k40?uom=0&qty=1 I talked to the engineering departments of several manufactures on which epoxy to use. I knew that I needed an ultra-low viscosity product but this one was recommended because it does not have any volatile solvents. Solvents could cause a problem in the sealed environment between the two skins because they would not be able to evaporate and might cause the skins to soften. I watched several videos on how vacuum infusion casting works and saw that I would be doing the same thing. In this process, the cloth is laid into the mold dry and covered with a plastic tarp that is sealed around the edges. The vacuum is applied to compress all of the fibers and then resin is pulled through the cloth causing it to fully wet out.
Crazy Dave Condon
There are varying degrees of repair for core rot but once was told to drill holes after checking with a moisture meter say 1/2 inch every foot and pour down epoxy resin spreading it by use of an air nozzle. In some cases weight had to be added to the deck if raised any but suggestion of a cover so the weight applied would not scratch. In the extreme of course was to dig out the rot and repair. Then reverse non skid was used to put back the non skid patteren.
- This site uses cookies to help personalise content, tailor your experience and to keep you logged in if you register. By continuing to use this site, you are consenting to our use of cookies. Accept Learn more…
WELCOME TO Elite Marine specialists
Let our 50 ton lift haul your vessel, servicing boats from 18' to 80' since 1998..
Elite Marine Specialists is a full service boat yard in St. Petersburg, Florida. We have been serving the community with yacht restoration and boat maintenance services since 1998. Let our company get you back on the water right in time for summer! We are experienced and have the know how to solve a wide range of problems that might be happening with your vessel. Need a full service boat yard in St Petersburg, call (727) 289-7019 today!
Carl Humbert
Owner/President
Yard Manager
Master Craftsman
Administration
Our Services
Here are a few of the services we offer and much, much more: Inboard/Outboards, Stern Drives, Gas or Diesel Motors Installs or Repairs - Service, Repair & Maintenance - Repower - Fiberglass / Gelcoat Repair - Topside Paint - Electrical - Electronics Install - Bottom Paint - Running Gear - Pressure Washing - Cutlass Bearings - Prop Reconditioning - Interior Renovation - Custom Fiberglass Parts - Woodwork - Upholstery - Vessel Loading / Unloading - Bow Thrusters ... Call us today for an estimate: (727) 289-7019 .
Electrical Systems
From troubleshooting battery problems to a complete rewire with custom electrical distribution panels. We can design a system to accommodate your needs, and make your electrical panel beautiful and service accessible.
Bottom Work
Elite offers a full spectrum of options for your bottom paint applications, from premium paint, to peels and blister repairs. We can utilize the application that best suits your needs and your budget.
Fiberglass, Gelcoat & Paint
From simple Gelcoat repairs to custom parts, Elite Marine has the experience and skill to take care of your needs. (Hurricane storm damage repairs, Bow Thrusters, Mezzanines, Swim platforms, Transom Doors, Deck Recore, Hard Tops, Fish Boxes, Imron - AWL Grip Paint Applications, Complete Interior Renovations.
From a standard engine maintenance service, to a complex, "they say it can't be done" repower, our capable crew will get your vessel ready to cruise or create that "head turner" you've always wanted. We can service anything from small outboards to large inboard diesels. Our mechanics don't cut corners when it comes to engines.
Get in touch
| is underway! Our rates are much less than the traditional yard rates because we do not have the big overhead to deal with. Quick service with lots of experience on all types of maintenance and repairs both above and below deck. Big projects are always welcome give us a call to discuss your needs! --> | BUTTON_SETUP_STOP ---> | |
| Enjoy easy access to the following services: --> | ||
© Copyright Salt Creek Boat works, Inc. 2009. All rights reserved. Site maintained & hosted by Problem Solvers Group .

IMAGES
VIDEO
COMMENTS
Soft Decks. The boat is out of the water now and the next step is to remove the deck hardware. I plan to fill all holes (oversized), fill with epoxy and redrill.u000bu000bI have done a hammer test on the deck and there may be more soft areas to check. I plan to have the deck and hull surveyed and checked for moisture before doing much more.
Marine deck repair DIY fix soft spots instantly. Home; Videos; About; Product Features; Instructions; FAQ; Contact; Shop; Finally a smart solution for soft decks! Learn More. ... Large Boat Kit - SKU-03900009981 UPC- 792105422862 $ 495.00 Add to cart; Case of 6 Cartridges - SKU-0070000780 UPC- 792105422879 $ 375.00 Add to cart
There are few things that send a potential buyer scampering or start an owner sweating faster than a soft deck. ... (1972) sailboat. To repair several "soft" deck spots; Drilled small (1/8″) holes around the spots & in the center of the spots. Using "non-expanding" aerosol insulation foam (Walmart or hardware store) injected this into ...
This way, there is no exposed wood to allow moisture into the deck. Similarly, if you make a large hole, such as for a hawsepipe, in a plywood deck, coat the exposed wood with epoxy. For a cored deck, scrape out a ring of core from between the two laminates and fill this area with thickened epoxy. With proper treatment, deck laminate ...
Quick deck soft spot repair. There is a guy in my sailing club that fixes soft spots by tapping to find the boundry. Drills a small inlet hole, and exit hole. Then injects the core void with 3M 5200 until it oozes out of the exit hole. It is a moisture cure, and very strong adhesive. And, would seal the source of the water intrusion.
Home Boat Maintenance Step-by-Step Deck Core Repair. Boat Maintenance; Step-by-Step Deck Core Repair. By. Drew Frye - Published: July 24, 2020 Updated: July 27, 2021. 7. Facebook. Twitter. ... And to your point on a hot sunny day in late August here in RI, in the afternoon, the deck was 116F on my temp. gun. The boat I'm working on came from ...
1. Remove the cabin port lights and hatches, deck hardware, rub rail etc. I know, I know there are a ton of things to take off and reattach. 2. Build a cradle just like a hull cradle but with many more contact points for the deck to support the deck shape. 3. Use a metal saw to cut the hull deck bolts.
Call the Tech Line 727-768-7509. Affiliate sales program: [email protected]. Sorry no returns on international orders or domestic, it's an 8lb box. The Injectadeck Team. Injectadeck is a carefully engineered structural marine foam and adhesive that cures hard as wood, quickly and easily repairing soft spots on your boat's fiberglass ...
Install a 1/4 air male hose fitting in the middle of the area. Attach a hose and vacum pump. Leave sucking at low pressure and remove the moisture. Later on, intruduce thinned epoxy into the holes and draw it accross the area. Close the holes one by one as epoxy comes out of the vaccum pipe.
It starts with a basic understanding of your sailboat deck. According. to Sail Magazine, many "decks are cored with end-grain balsa or plywood. with a fiberglass laminate on each side.". If this is the case for you, you. might notice that moisture can work its way into the core of the deck, which.
Nov 1, 2001. #5. Deck repair. If you find that the core material is wet and you decide to remove the top layer of fiberglass, the circular saw is hard to use. It's big, bulky and hard to control -- especially in tight quarters or around curves. Instead, you could use a Dremel with a cutting blade to cut off the top layer of deck material.
Scored end grain balsa is fine. Apply thickened epoxy to the core with a grooved spreader. You can make one in a few minutes from the small disposable spreaders with a razor knife. About 3/16-inch thickness is about right. The mixture should be thick enough to stick over head, but thin enough to flow into the kerfs.
Boat Deck Repair: HOW TO Repair a sailboat deck that is rotten to the balsa core! We recommend fixing s sail boat deck BEFORE The anchor windlass just rips r...
Member. So, in case anyone is interested, this is what I did to repair two rather big soft spots on my deck (on each side where one mostly sits). 1. put masking tape on the whole area and mark the area. 2. drill small holes about two to three inches apart in the whole area (just through the top-layer of course).
You will probably need a brass fitting with a barb for the vacuum pump to attach the hose to the pump. On the other end, wrap some butyl rubber around the hose about 1/2 inch from the end, stick the hose into one of the holes and press the butyl in to seal the hole/hose. Turn on the pump and you are good to go.
Step 3. Wax the surface around the outside of the hole with an automotive paste wax. Cut a sheet of countertop material that's a foot longer and wider than the hole, and paste-wax one side. Spray the paste-waxed side with mold-release spray (polyvinyl alcohol) and duct tape it over the hole, with the waxed side to the deck.
Subscribe to our channel Sailboat Care and Repair for more tutorial videos! Click https://bit.ly/2K2hBriThis is the basic data on what a cored deck looks lik...
All the deck area on my boat was drilled with holes in a 2x2in grid pattern and filled with epoxy. The decks were not soft, so maybe this method does "work". However, there were large areas of rotten core, and soaking wet core. I probably pulled gallons of water out of my decks. The boat had always been stored inside heated so this wasn't an issue.
The Yacht Rigger is a one-stop business for all your marine rigging needs and more. We have had Stephen and his crew do a lot of work on our boat (a 42' sailing catamaran) including new standing rigging, running rigging, construction of a solar arch and tender lift system, custom made solar panels, installation of solar controllers, custom made dive tank holders, increased the length of our ...
Apr 5, 2009. 2,906. Catalina '88 C30 tr/bs Oak Harbor, WA. Oct 7, 2017. #1. I have recently been following a couple of threads where wet deck core is being repaired by cutting off interior or exterior skin and full replacement of the core. Two years ago I thought that I was in for the same on my 1988 Catalina 30.
Elite Marine Specialists is a full service boat yard in St. Petersburg, Florida. We have been serving the community with yacht restoration and boat maintenance services since 1998. Let our company get you back on the water right in time for summer! We are experienced and have the know how to solve a wide range of problems that might be ...
Salt Creek Boatworks, Inc.: Full Service Boat Yard also welcoming Do-It-Yourselfers. expanded FULL SERVICE MOBILE REPAIR is underway! Our rates are much less than the traditional yard rates because we do not have the big overhead to deal with. Quick service with lots of experience on all types of maintenance and repairs both above and below deck.
See more reviews for this business. Top 10 Best Boat Repair in Saint Petersburg, FL - September 2024 - Yelp - AI Marine Service, Bonified Marine Services, JT's Mobile Marine Service, Dave's Boat Repair, Bluewater Custom Marine, Coupes Mobile Marine Service, Perfection Mobile Marine Repairs, Bullfrog Creek Marine, New Waves, Outboard Marine ...